shooting sports manual bsa

The BSA Shooting Sports Manual provides comprehensive guidelines for safe and age-appropriate shooting activities, ensuring a fun and educational experience for youth participants nationwide.

1.1 Purpose and Scope of the Manual

The BSA Shooting Sports Manual is designed to provide detailed guidelines for conducting safe and effective shooting sports programs within the Boy Scouts of America. Its purpose is to ensure that all activities are age-appropriate, supervised, and aligned with BSA safety standards. The manual serves as a primary resource for leaders, instructors, and participants, covering essential protocols, training requirements, and best practices for various shooting disciplines. It emphasizes safety, skill development, and adherence to BSA policies, ensuring a positive and educational experience for all involved.

1.2 Importance of Safety in Shooting Sports

Safety is paramount in BSA shooting sports, as it ensures the well-being of participants and bystanders. Adhering to strict protocols minimizes risks and fosters a responsible environment. Proper training, supervision, and equipment maintenance are critical to preventing accidents. The manual emphasizes the importance of following established safety guidelines, such as appropriate shooter-to-instructor ratios and emergency preparedness. By prioritizing safety, BSA programs teach participants not only shooting skills but also discipline, respect, and accountability, creating a positive and secure experience for all involved.

1.3 Overview of BSA Shooting Sports Programs

BSA shooting sports programs offer youth engaging, age-appropriate activities emphasizing safety, skill development, and fun. The manual covers rifle, shotgun, archery, and air rifle shooting, tailored for Cub Scouts, Boy Scouts, and Venturers. These programs promote teamwork, discipline, and responsibility while fostering an appreciation for firearms and archery. Certified instructors ensure a safe learning environment, guiding participants through progressive skill levels. The curriculum also introduces new technologies, such as PCP air rifles, enhancing the educational and competitive aspects of shooting sports within Scouting.

Safety Guidelines and Protocols

BSA shooting sports emphasize strict safety protocols, including proper firearm handling, range rules, and emergency preparedness, ensuring a secure environment for all participants.

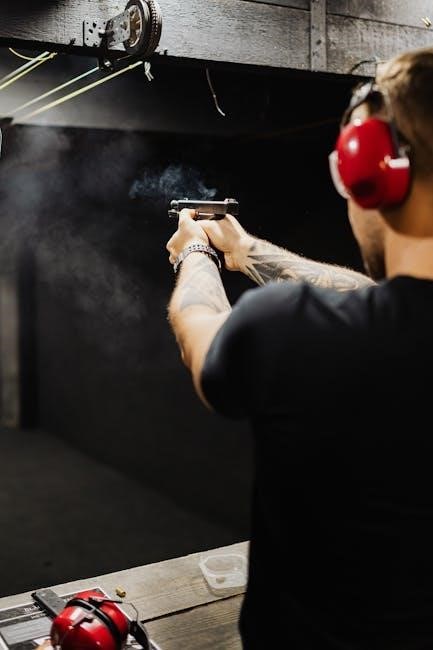
2.1 Range Safety Rules and Regulations

Range safety rules are critical for ensuring a secure environment. Key regulations include always pointing firearms downrange, keeping fingers off triggers until ready to shoot, and wearing eye and ear protection. Shooters must remain supervised at all times, and only authorized personnel may handle firearms. Proper backstops and target placement are mandatory to prevent stray shots. All participants must adhere to range commands and signaling systems. Safety briefings are required before any shooting activity, and violations of protocols may result in immediate dismissal from the range.

2.2 Proper Handling and Storage of Firearms

Proper handling and storage of firearms are essential for safety and longevity. Always keep firearms unloaded when not in use and store them in a dry, secure location. Use gun cases or safes to prevent unauthorized access. Ensure the muzzle is pointed in a safe direction, and never touch the trigger until ready to shoot. Regularly inspect firearms for damage or wear. Store ammunition separately from firearms, and follow local regulations for storage. Proper maintenance, including cleaning and lubrication, ensures optimal performance and longevity of the firearm.

2.3 Emergency Procedures and First Aid

In case of an accident, remain calm and follow established protocols. Call 911 immediately for severe injuries. Ensure the area is safe and secure to prevent further incidents. Administer first aid, such as applying direct pressure to wounds or using tourniquets if trained. Keep a first aid kit on hand with supplies for treating injuries common in shooting sports, like minor cuts or burns. Document incidents thoroughly and report them to BSA authorities. Regular training in first aid and emergency response is crucial for all participants and staff. Prevention and preparedness are key to ensuring safety.

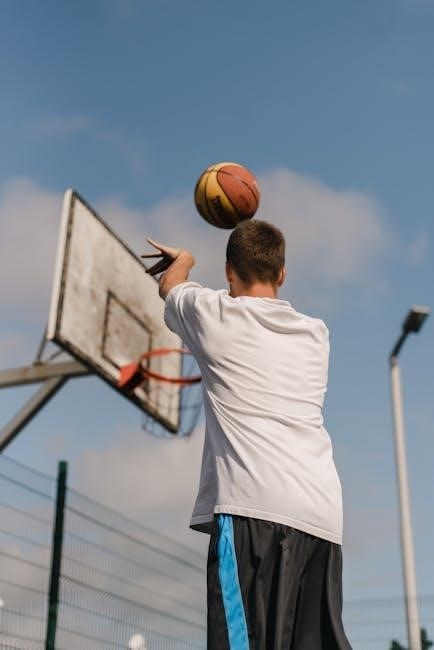
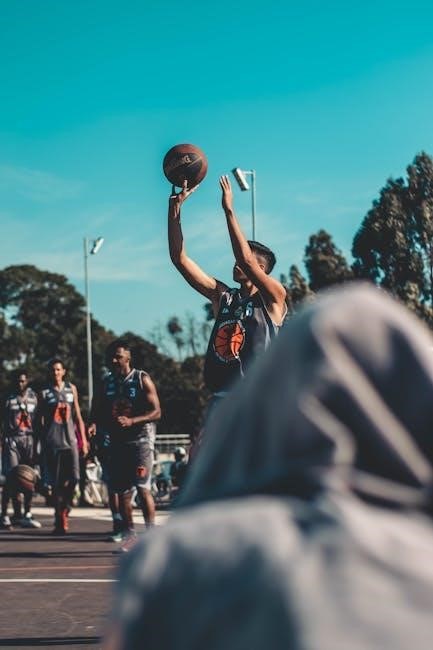
Shooting Disciplines Covered in the Manual

The manual covers rifle shooting, shotgun techniques, archery, and air rifle/pistol disciplines, providing detailed guidance for each to ensure safe and effective participation in BSA programs.

3.1 Rifle Shooting Basics

Rifle shooting basics emphasize safety, proper handling, and fundamental marksmanship skills. Participants learn stance, grip, and sight alignment to improve accuracy. The manual outlines step-by-step techniques for loading, aiming, and firing, ensuring a solid foundation for beginners. Safety protocols, such as keeping the muzzle pointed downrange and fingers off the trigger until ready to shoot, are stressed. Training progresses from basic to advanced skills, with instructors guiding youth through practice sessions. The goal is to build confidence and competence in rifle handling while adhering to BSA safety standards and guidelines.

3.2 Shotgun Shooting Techniques

Shotgun shooting techniques focus on proper stance, grip, and alignment to effectively hit moving targets. The manual teaches methods like the “swing through” and “quick kill” for clay pigeons. Safety is paramount, with emphasis on muzzle control and proper loading procedures. Youth learn to handle different shotgun types, including break-action and semi-automatic models. Instruction covers pre-shot preparation, follow-through, and post-shot safety checks. The goal is to develop proficiency and enjoyment in shotgun sports while maintaining BSA’s high safety standards and guidelines for all participants.

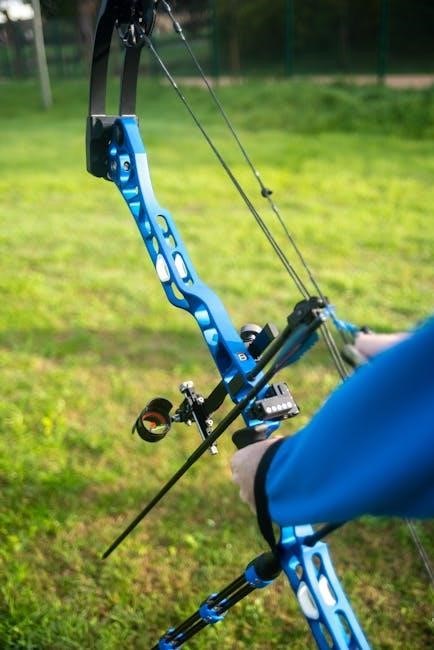
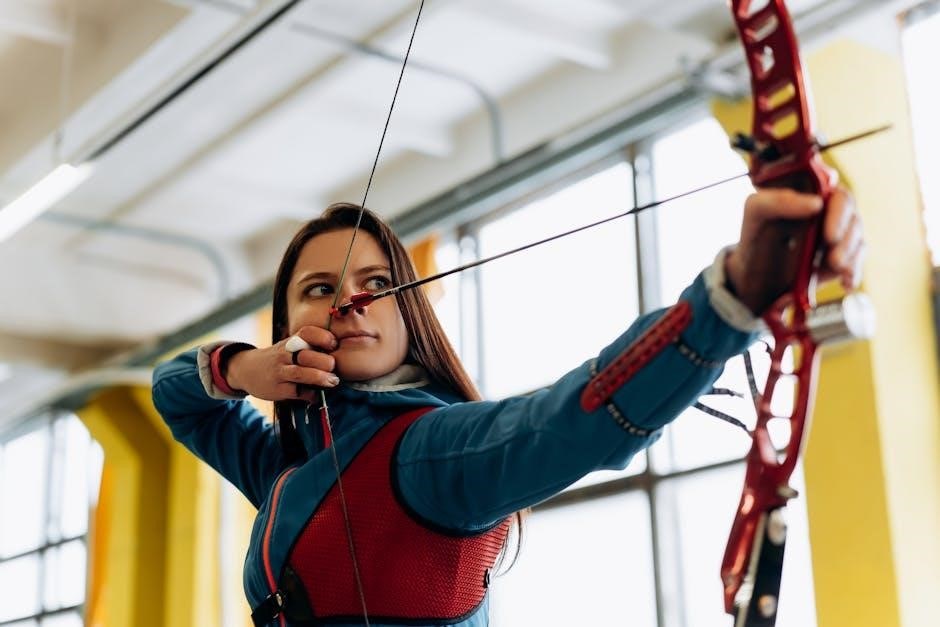
3.3 Archery and Its Role in BSA Programs

Archery is a cornerstone of BSA shooting sports, emphasizing precision, focus, and patience. The manual outlines age-appropriate instruction, starting with basic bow handling and progressing to advanced techniques. Safety is a priority, with strict protocols for equipment inspection and range setup. Programs are designed to foster teamwork and personal growth, aligning with BSA’s values. Archery activities are structured to accommodate all skill levels, from Cub Scouts to Venturers, ensuring a fun and educational experience while promoting a lifelong appreciation for the sport.

3.4 Air Rifle and Pistol Shooting

Air rifle and pistol shooting are popular disciplines within BSA programs, offering youth a safe introduction to precision marksmanship. These activities emphasize control, focus, and proper technique. The manual outlines specific guidelines for handling and maintaining air-powered firearms, ensuring safety and optimal performance. Participants learn fundamental shooting skills, progressing from basic target practice to more advanced competitions. Air rifle and pistol shooting foster discipline and responsibility, aligning with BSA’s commitment to developing character and confidence in young participants through structured, enjoyable experiences.

Equipment and Maintenance

This section covers essential equipment for shooting sports, including firearms, optics, and accessories, with detailed maintenance tips to ensure safety, accuracy, and optimal performance for all participants.

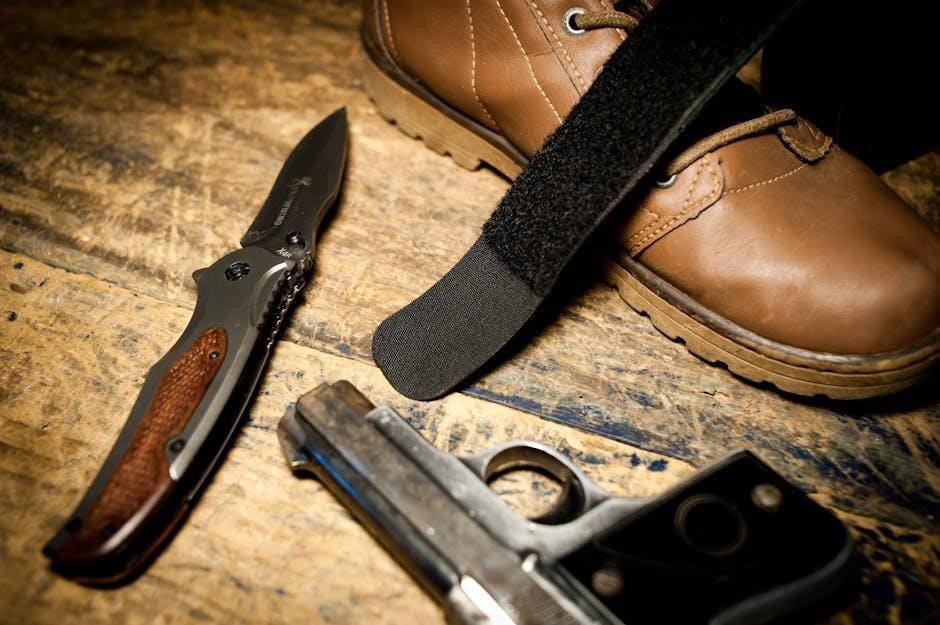
4.1 Firearms and Accessories Overview

This section details the types of firearms and accessories used in BSA shooting sports, including rifles, shotguns, air guns, and archery equipment. It emphasizes the importance of age-appropriate firearms selection to ensure safety and suitability for participants; Accessories such as scopes, slings, and targets are also discussed, along with their proper use and maintenance. The manual highlights BSA-approved models, such as the BSA Scorpion Tactical and Brigadier, ensuring equipment aligns with safety standards and program goals. Proper care and handling are stressed to maintain performance and longevity.

4.2 Maintenance Tips for Optimal Performance

Regular cleaning and lubrication of firearms are essential for optimal performance and longevity. The manual recommends using approved cleaning solvents and lubricants to prevent corrosion and wear. Proper storage in dry, secure locations is also emphasized to maintain functionality. Additionally, routine inspection of barrels, chambers, and firing mechanisms ensures safety and accuracy. Archery equipment, such as bows and arrows, requires similar care, with checks for string wear and arrow integrity. Neglecting maintenance can lead to equipment failure, making consistent upkeep a priority for all BSA shooting sports activities.

4.3 Choosing the Right Optics for Accuracy

Selecting the appropriate optics is crucial for precision in shooting sports. Scopes with adjustable magnification are ideal for rifles, while shotguns benefit from simpler, fast-targeting optics. Archery equipment may use sighting aids like pins or magnifying lenses. Optics should align with the shooter’s skill level and discipline, ensuring clarity and durability. Proper mounting and zeroing are essential for accuracy. The manual emphasizes matching optics to the firearm’s capabilities and the shooter’s needs, enhancing performance across all BSA shooting sports disciplines while maintaining safety and consistency.

Training and Certification

BSA offers certifications like NRA Range Safety Officer and USA Archery Instructor to ensure safe, skilled instruction in shooting sports, promoting excellence and safety for all participants.

5.1 NRA Range Safety Officer Certification

The NRA Range Safety Officer Certification is a critical component of BSA’s training programs, ensuring that instructors can manage ranges safely and effectively. This certification focuses on teaching safety protocols, emergency procedures, and best practices for supervising shooting activities. Participants learn to identify and mitigate risks, ensuring a secure environment for all participants. The training emphasizes practical scenarios and hands-on experience, preparing officers to handle various situations confidently. By requiring this certification, BSA ensures that all shooting sports activities are conducted with the highest standards of safety and professionalism.

5.2 USA Archery Instructor/Coach Certification

The USA Archery Instructor/Coach Certification is a cornerstone of BSA’s archery programs, equipping leaders with the skills to teach safe and effective archery techniques. This certification focuses on proper equipment use, shooting form, and range safety, ensuring a positive experience for youth participants. Coaches learn to adapt instruction for varying skill levels and ages, fostering confidence and skill development. The program emphasizes hands-on training and scenario-based learning, aligning with BSA’s commitment to safety and excellence in shooting sports programs.

5.3 BSA-Specific Training Programs

BSA-specific training programs are designed to ensure leaders and instructors are well-prepared to deliver safe and engaging shooting sports experiences. These programs emphasize age-appropriate instruction, hands-on learning, and continuous skill development. They cover essential topics like range safety, equipment maintenance, and teaching methodologies tailored to BSA’s youth-focused mission. By completing these programs, participants gain the confidence and expertise to lead successful shooting sports activities, fostering a culture of safety and enjoyment for all involved. These trainings are regularly updated to reflect best practices and evolving standards in shooting sports education.

Age-Appropriate Shooting Sports Programs

BSA offers shooting sports tailored to different age groups, ensuring activities are safe, engaging, and skill-appropriate. Programs are designed to foster teamwork, discipline, and outdoor enjoyment while emphasizing safety.

6.1 Cub Scout Shooting Sports Guide

The Cub Scout Shooting Sports Guide is a comprehensive resource for leaders and volunteers, ensuring age-appropriate activities and safety. Designed for younger participants, it focuses on basic skills and fun. Activities include archery and BB gun shooting, tailored to Cub Scouts’ developmental levels. The guide emphasizes safety protocols, proper supervision, and skill progression. It supports the development of confidence, teamwork, and sportsmanship while introducing youth to shooting sports in a controlled environment. This program aligns with BSA’s mission to foster character growth and outdoor education through engaging activities.

6.2 Boy Scout and Venturing Programs

Boy Scout and Venturing programs offer advanced shooting sports opportunities, emphasizing skill mastery and safety. These programs build on foundational knowledge, introducing Scouts to rifle, shotgun, and archery disciplines. Participants learn advanced techniques, safety protocols, and leadership skills. Venturing programs often include specialized training and competitions, fostering a deeper appreciation for shooting sports. Safety remains a priority, with certified instructors guiding activities. These programs encourage personal growth, teamwork, and responsible firearm handling, aligning with BSA’s mission to prepare youth for life’s challenges through engaging outdoor experiences.

Range Operations and Management

Effective range operations ensure safety, efficiency, and adherence to BSA and NRA standards. Proper management includes shooter supervision, equipment maintenance, and organizing events to promote skill development and fun.

7;1 Setting Up a Safe Shooting Range

Setting up a safe shooting range involves careful planning and adherence to BSA guidelines. Ensure proper backstops, clear shooting lanes, and designated safety zones. Install appropriate signage and barriers to prevent unauthorized access. Conduct regular inspections of equipment and terrain to identify hazards. Supervise shooters at all times, maintaining the recommended safety ratio of range staff to participants. Establish clear communication protocols and emergency procedures. Regularly review and update range setup to comply with current BSA and NRA standards, ensuring a secure environment for skill development and enjoyment of shooting sports activities.

7.2 Managing Shooters and Instructors

Effective management of shooters and instructors is crucial for a safe and organized range experience. Ensure all instructors hold current certifications, such as NRA Range Safety Officer or USA Archery Instructor. Assign instructors based on shooter skill levels and discipline expertise. Maintain strict supervision ratios as outlined in the BSA Shooting Sports Manual. Conduct regular checks to ensure shooters follow safety protocols and handle equipment properly. Encourage open communication and provide constructive feedback to improve performance. Prepare instructors to handle emergencies and ensure all participants understand range rules and safety procedures before commencing activities.

National Range and Target Activities Manual

The National Range and Target Activities Manual is the official guide for BSA shooting sports, outlining safety, rules, and best practices for target shooting and range activities.

8.1 Key Updates in the 2024 Edition

The 2024 Edition of the National Range and Target Activities Manual introduces updated safety protocols, expanded age-specific guidelines, and new sections on equipment maintenance. It includes revised procedures for range setup and operation, ensuring compliance with current standards. Additional resources for instructors and participants have been added, focusing on best practices for teaching shooting sports. The manual also incorporates feedback from previous editions, enhancing clarity and accessibility for both new and experienced shooters. These updates reinforce the BSA’s commitment to safety and excellence in shooting sports programs.

8.2 Relevance to BSA Shooting Sports

The National Range and Target Activities Manual is integral to BSA shooting sports, providing standardized guidelines for safe and structured programs. It aligns with BSA’s mission to teach youth about firearms, archery, and other shooting disciplines responsibly. The manual ensures consistency across all BSA programs, emphasizing safety, skill development, and age-appropriate activities. By following its guidelines, instructors and volunteers can create engaging, educational experiences that foster confidence and character in participants. This alignment ensures BSA shooting sports remain a cornerstone of Scouts’ skill-building and outdoor education.

Historical and Competitive Aspects

The BSA shooting sports program has a rich history, fostering marksmanship and safety. It offers competitive opportunities through national events and recognition programs for skilled youth participants.

9.1 History of Shooting Sports in BSA

The Boy Scouts of America (BSA) has a long-standing tradition of promoting shooting sports, dating back to the early 20th century. Originally focused on rifle marksmanship, the program evolved to include archery, shotgun, and air rifle activities. Safety and skill development have always been central to its mission. The BSA Shooting Sports Manual was first introduced to standardize practices nationwide. Over the years, it has been updated to reflect modern techniques and equipment, ensuring relevance and safety for youth participants. The 2024 edition emphasizes age-appropriate training and competitive opportunities, inspiring responsibility and teamwork among Scouts.

9.2 Competitive Shooting Opportunities

The BSA offers various competitive shooting opportunities, fostering skill development and sportsmanship. National events and local competitions provide Scouts with platforms to showcase their marksmanship. Programs are tailored to different age groups, ensuring age-appropriate challenges. These events emphasize safety, teamwork, and personal growth. Participation in competitive shooting sports aligns with the BSA’s mission to build character and confidence. The 2024 manual highlights updated guidelines for these competitions, ensuring they remain engaging and safe for all participants.

The BSA Shooting Sports Manual emphasizes safety, skill development, and character building through structured programs, inspiring youth to engage in shooting sports responsibly and confidently.

10.1 Final Thoughts on BSA Shooting Sports

BSA Shooting Sports foster discipline, responsibility, and camaraderie, offering youth a structured path to master marksmanship skills while emphasizing safety and ethical practices. The programs are designed to be inclusive, catering to various age groups and skill levels, ensuring a positive experience for all participants. By adhering to the guidelines in the manual, Scouts and leaders can ensure a safe and enjoyable environment, promoting personal growth and a lifelong appreciation for shooting sports.

10.2 Encouragement for Participation

Participating in BSA Shooting Sports offers youth and adults alike the opportunity to develop marksmanship skills, build confidence, and foster teamwork in a safe, structured environment. These programs are designed to be engaging and inclusive, allowing participants of all skill levels to grow and succeed. By joining, individuals can make lasting friendships, challenge themselves, and create memorable experiences while learning valuable life skills. Encourage everyone to take part and embrace the camaraderie and personal growth that BSA Shooting Sports provides.

gantala panchangam 2024 to 2025 pdf

The Gantala Panchangam 2024-2025, also known as the Krodhi Nama Samvatsara, is a traditional Telugu almanac providing lunar and solar cycle details, auspicious dates, and cultural significance for the year.

What is a Panchangam?

A Panchangam is a traditional Hindu almanac detailing lunar and solar cycles, auspicious timings, and cultural events. It guides rituals, festivals, and daily activities, offering insights into Tithi (lunar day), Nakshatra (star), and Yoga (planetary alignment). This ancient calendar is revered for its spiritual and practical significance, helping individuals align their actions with celestial rhythms for harmony and prosperity.

The Significance of Gantala Panchangam in Telugu Culture

Gantala Panchangam holds profound cultural and spiritual significance in Telugu tradition, guiding festivals, rituals, and daily life. It marks Ugadi, the Telugu New Year, and outlines auspicious timings for ceremonies like marriages and house warmings. This almanac preserves Vedic wisdom, connecting generations to their heritage and helping communities align their celebrations with celestial rhythms and cultural values seamlessly.

Key Features of Gantala Panchangam 2024-2025

Gantala Panchangam 2024-2025 includes lunar and solar cycles, auspicious dates, planetary positions, sunrise/sunset timings, and cultural events like Ugadi, providing a comprehensive guide for religious and practical planning.

Lunar and Solar Cycle Calculations

The Gantala Panchangam 2024-2025 meticulously details lunar and solar cycles, including phases of the moon, eclipses, and planetary transits. It aligns traditional Vedic calculations with modern astronomical data, ensuring accuracy for religious rituals and daily planning. The almanac provides precise timings for sunrise, sunset, and moonrise, essential for spiritual and cultural observances throughout the year.

Auspicious Dates and Festivals

The Gantala Panchangam 2024-2025 highlights auspicious dates for festivals like Ugadi, Dasara, and Deepavali, along with sacred rituals and ceremonies. It provides detailed timing for muhurtas, ensuring optimal planning for religious observances and cultural celebrations. This section is a vital guide for Telugu communities to align their traditions with the almanac’s precise calendar, fostering spiritual harmony and cultural continuity throughout the year.

Planetary Positions and Astrological Insights

The Gantala Panchangam 2024-2025 offers detailed planetary positions, predicting their influences on zodiac signs. It provides insights into auspicious transits, eclipses, and astrological events, helping individuals understand celestial impacts on their lives. This section is a valuable resource for astrological guidance, enabling users to make informed decisions aligned with cosmic alignments and Vedic principles throughout the year.

Importance of Gantala Panchangam in Daily Life

Gantala Panchangam guides daily routines, rituals, and decision-making by providing auspicious timings, enhancing spiritual growth, and ensuring alignment with cosmic and cultural traditions for a harmonious life.

spiritual and Religious Significance

Gantala Panchangam holds profound spiritual importance, serving as a sacred guide for aligning daily routines with celestial rhythms. It provides Tithi, Nakshatra, and Yoga details, essential for planning rituals and ceremonies. Rooted in Vedic astrology, it bridges ancient traditions with modern life, helping devotees connect with divine forces and maintain cultural heritage. Its insights deepen spiritual practices and foster a harmonious lifestyle.

Practical Uses for Planning and Decision-Making

Gantala Panchangam is a vital tool for planning daily routines, ceremonies, and festivals. It provides detailed lunar and solar cycle timings, aiding in selecting auspicious dates for weddings, housewarmings, and other events. The calendar also offers sunrise and sunset times, enabling precise scheduling. Its practical insights help align human activities with celestial rhythms, ensuring harmony and success in personal and professional life.

How to Read and Interpret Gantala Panchangam

Gantala Panchangam is read by understanding Tithi, Nakshatra, and Yoga, which guide lunar and solar cycles. These elements help determine auspicious timings for rituals and daily activities, aligning human endeavors with celestial rhythms for optimal outcomes.

Understanding Tithi, Nakshatra, and Yoga

Tithi represents the lunar day, Nakshatra the star constellation, and Yoga the alignment of sun and moon. Together, they form the core of Gantala Panchangam, guiding timings for rituals, ceremonies, and daily activities. Accurate interpretation ensures harmony with celestial influences, essential for spiritual and practical planning, and is a cornerstone of Telugu astrological traditions for determining auspicious moments and personal decisions.

Interpreting Auspicious and Inauspicious Timings

Auspicious timings in Gantala Panchangam are determined by aligning Tithi, Nakshatra, and Yoga, ensuring harmony for ceremonies and decisions. Inauspicious periods, marked by unfavorable celestial alignments, are avoided for significant events. This ancient system guides users in selecting optimal times for rituals, marriages, and other milestones, blending astrological wisdom with practical application to enhance prosperity and minimize obstacles in daily life and spiritual pursuits.

Downloading Gantala Panchangam 2024-2025 PDF

The Gantala Panchangam 2024-2025 PDF is available for free download from various sources, offering easy access to auspicious timings, festivals, and planetary positions for planning and spiritual guidance.

Free Download Options and Sources

The Gantala Panchangam 2024-2025 PDF is available for free download from various sources, including TTD and Butte Vari Panchangam. These reputable platforms offer direct links to access the almanac, ensuring users can easily obtain the calendar for planning festivals, auspicious timings, and spiritual guidance. Downloading is straightforward, making it accessible to everyone.

Steps to Access the PDF Version

To access the Gantala Panchangam 2024-2025 PDF, visit official websites like TTD or Butte Vari Panchangam. Search for the almanac, locate the download link, and select the correct version. Follow the prompts to complete the download, ensuring you have the latest edition for accurate planning and spiritual guidance throughout the year.

Major Festivals and Events in Gantala Panchangam 2024-2025

The Gantala Panchangam 2024-2025 highlights major festivals like Ugadi, the Telugu New Year, and other significant celebrations, providing dates and cultural context for each event.

Ugadi and Its Cultural Importance

Ugadi, the Telugu New Year, is celebrated on March 30, 2025, marking the beginning of the Krodhi Nama Samvatsara. It symbolizes renewal and prosperity, with rituals like Panchangam Pathanam, a must for all Telugu people. Families gather for traditional meals and cultural practices, reflecting the deep-rooted heritage and spiritual significance of this festival, which guides both spiritual and practical life throughout the year.

Other Key Festivals and Celebrations

Besides Ugadi, the Gantala Panchangam highlights other significant festivals like Dasara, Diwali, and Sankranti, which hold cultural and spiritual importance. These celebrations, rooted in tradition, are observed with rituals, family gatherings, and communal prayers. The Panchangam provides auspicious timings, enabling devotees to plan their ceremonies and festivities in harmony with lunar and solar cycles, ensuring spiritual and cultural alignment throughout the year.

Muhurtha Calculations in Gantala Panchangam

Gantala Panchangam provides detailed Muhurtha calculations, helping select auspicious timings for ceremonies, marriages, and house warmings, ensuring alignment with favorable lunar and solar positions for prosperity.

Choosing Auspicious Times for Ceremonies

Gantala Panchangam aids in selecting optimal timings for ceremonies, ensuring alignment with favorable Tithi, Nakshatra, and Yoga. By analyzing lunar and solar positions, it helps determine Muhurtha for marriages, house warmings, and rituals, promoting prosperity and success. Its detailed calculations guide users in planning significant life events, adhering to Vedic traditions and cultural practices seamlessly.

Marriage, House Warming, and Other Ceremonies

The Gantala Panchangam is essential for planning significant ceremonies like marriages and house warmings. It provides detailed Tithi, Nakshatra, and Yoga calculations to ensure auspicious timing. This almanac helps in selecting favorable dates, promoting prosperity and harmony in family life, and adhering to Vedic traditions and cultural practices.

Sunrise and Sunset Timings

Gantala Panchangam provides precise sunrise and sunset timings, essential for aligning daily rituals, prayers, and routines with natural cycles, ensuring harmony inTelugu cultural and spiritual practices.

Daily and Monthly Timings

Gantala Panchangam 2024-2025 provides precise daily and monthly sunrise and sunset timings, aiding in aligning rituals and routines with celestial cycles. It includes lunar dates, ensuring accurate scheduling of religious and cultural practices throughout the year. Monthly charts offer detailed timing insights, helping users plan auspicious events and daily activities efficiently, rooted in traditional Telugu customs and astrological principles.

Importance in Rituals and Daily Routines

Gantala Panchangam 2024-2025 plays a vital role in aligning rituals and routines with celestial cycles. It provides precise timings for sunrise, sunset, and lunar phases, ensuring proper execution of religious ceremonies and daily practices. This alignment fosters harmony and spiritual balance, making it an indispensable guide for cultural and religious observances in the Telugu tradition, enhancing both spiritual growth and practical daily planning.

Planetary Positions and Predictions

Gantala Panchangam 2024-2025 provides detailed insights into planetary positions, offering astrological predictions for each zodiac sign. It highlights key planets like Sun, Moon, and Jupiter, influencing life events and decisions.

Key Planets and Their Influences

The Gantala Panchangam 2024-2025 highlights key planets like Sun, Moon, Mercury, Venus, Mars, Jupiter, and Saturn, detailing their celestial movements and influences on human life. Sun signifies authority and strength, while Moon governs emotions. Mercury impacts communication, Venus influences relationships, Mars drives energy, Jupiter expands opportunities, and Saturn enforces discipline. These planetary positions guide individuals in making informed decisions aligned with cosmic rhythms.

Annual Predictions for Each Zodiac Sign

The Gantala Panchangam 2024-2025 provides detailed annual predictions for each zodiac sign, offering insights into career, relationships, health, and spiritual growth. From Aries to Pisces, it outlines favorable periods, challenges, and remedial measures based on planetary alignments. These predictions help individuals align their actions with cosmic influences, ensuring harmony and success throughout the year.

Cultural and Religious Significance

The Gantala Panchangam 2024-2025 holds deep cultural and religious significance, serving as a guiding tool for rituals, festivals, and spiritual practices in Telugu tradition, rooted in Vedic astrology.

Role in Telugu Tradition and Heritage

The Gantala Panchangam is a cornerstone of Telugu tradition, guiding rituals, festivals, and daily life. It connects generations, preserving cultural heritage through its astrological insights and traditional practices, deeply rooted in Vedic principles and community customs.

Connection to Vedic Astrology

Gantala Panchangam deeply aligns with Vedic astrology, providing precise planetary positions and astrological predictions. It serves as a vital tool for understanding cosmic influences on zodiac signs, guiding spiritual and practical decisions rooted in ancient Vedic principles and traditions.

Types of Gantala Panchangam

Gantala Panchangam includes TTD Panchangam, Butte Vari Panchangam, and other variants, each offering unique astrological insights and cultural relevance, catering to different traditions within the Telugu community.

TTD Panchangam

The TTD Panchangam is a prominent version of the Gantala Panchangam, published by the Tirumala Tirupati Devasthanams. It provides detailed lunar and solar cycle calculations, muhurat timings, and festival dates for 2024-2025. Known for its accuracy and adherence to Vedic principles, it is a trusted source for spiritual and cultural activities. Available as a free PDF download, it is widely used by the Telugu community. The TTD Panchangam also includes planetary positions and auspicious timings, making it essential for planning religious ceremonies and daily routines.

Butte Vari Panchangam

Butte Vari Panchangam, authored by Sri Butte Veerabadhra Daivagna, is a respected variant of the Gantala Panchangam. It provides detailed timings, auspicious dates, and cultural insights for 2024-2025. This almanac is widely trusted for its accuracy and is often used for planning religious ceremonies and daily routines. It is available as a free PDF download, making it accessible to the Telugu community worldwide.

Other Variants

Besides TTD and Butte Vari, other notable variants include Sri Gayatri Panchangam, Pidaparthi Vari, and Nemani Vari. These offer similar lunar-solar details, auspicious timings, and cultural insights specific to the Telugu community. Each variant may have slight differences in calculations or focus areas but serves the same purpose of guiding spiritual and practical life. They are also available for free download in PDF format.

Benefits of Using Gantala Panchangam

Using Gantala Panchangam 2024-2025 offers spiritual growth through rituals and practical guidance for daily life, ensuring harmony and balance by aligning activities with celestial rhythms and traditions.

spiritual Growth and Guidance

Gantala Panchangam 2024-2025 serves as a spiritual guide, offering insights into auspicious timings for rituals and meditation, fostering a deeper connection with divine forces and enhancing personal spiritual growth through alignment with celestial rhythms and Vedic traditions.

Practical Benefits in Daily Life

Gantala Panchangam 2024-2025 provides practical benefits by offering detailed timings for daily routines, aiding in planning events like marriages and ceremonies, and guiding agricultural activities, thus helping users align their tasks with favorable celestial conditions for optimal outcomes and prosperity in their personal and professional lives.

Troubleshooting Common Issues

Addressing discrepancies in dates and resolving interpretation conflicts require consulting experts or reliable sources, ensuring accurate understanding and effective use of the Gantala Panchangam 2024-2025.

Understanding Discrepancies in Dates

Discrepancies in Gantala Panchangam dates may arise due to variations in lunar cycle calculations or regional time differences. Users should cross-verify with trusted sources or consult experts to resolve such issues, ensuring accurate interpretations and effective planning for ceremonies and festivals.

Resolving Conflicts in Interpretations

Conflicts in interpretations of Gantala Panchangam can be resolved by consulting trusted astrological experts or referring to authoritative sources. Ensuring accurate calculations and understanding regional variations helps in aligning interpretations. Seeking guidance from experienced pandits or using validated Panchangam sources minimizes discrepancies and provides clarity for effective decision-making and ceremonial planning.

The Gantala Panchangam 2024-2025 serves as a cultural and spiritual guide, offering comprehensive insights into auspicious timings, festivals, and planetary positions, aiding in informed planning and decision-making.

Final Thoughts on the Importance of Gantala Panchangam

The Gantala Panchangam 2024-2025 is a vital resource for cultural and spiritual guidance, offering insights into auspicious timings, festivals, and planetary positions. It bridges tradition with modern life, providing practical and spiritual benefits. By following its guidance, individuals can align their actions with cosmic rhythms, ensuring harmony and prosperity. Its significance lies in preserving heritage while aiding decision-making and personal growth.

Encouragement to Use the Panchangam

Embrace the Gantala Panchangam 2024-2025 for its wealth of traditional wisdom and practical guidance. By using this almanac, you align your life with auspicious timings and cultural significance, ensuring harmony and prosperity. Download it now to access valuable insights and plan your year effectively, blending spiritual growth with everyday decision-making seamlessly.

Call to Action

Download the Gantala Panchangam 2024-2025 PDF now and start planning your year with auspicious timings and cultural insights. Access the PDF here.

Download the Gantala Panchangam 2024-2025 PDF

The Gantala Panchangam 2024-2025 PDF is available for free download from trusted sources like TTD, Butte Vari, and other platforms. Simply visit their official websites or use direct links to access the PDF version. This almanac provides detailed information on auspicious dates, planetary positions, and cultural events, making it essential for planning your year according to Telugu traditions.

Start Planning Your Year with Auspicious Timing

With the Gantala Panchangam 2024-2025 PDF, you can align your plans with auspicious timings, ensuring prosperity and success. This almanac details favorable dates for ceremonies, festivals, and daily activities, helping you make informed decisions rooted in tradition. Download now and seamlessly integrate ancient wisdom into your modern lifestyle for a harmonious year ahead.

sherri hill size guide

The Sherri Hill Size Guide helps determine the perfect fit for dresses by providing detailed measurements for bust, waist, and hips, ensuring a flawless fit for every body type.

1.1 Understanding the Importance of Proper Sizing

Proper sizing is crucial for ensuring a flawless fit and enhancing the overall appearance of Sherri Hill dresses. Incorrect sizing can lead to discomfort, unflattering silhouettes, or the need for costly alterations. By understanding your measurements, you can select a dress that complements your body type and boosts confidence. Sherri Hill’s size guide provides precise measurements for bust, waist, and hips, helping you make informed decisions. Accurate sizing ensures a perfect balance between style and comfort, making it essential for a truly unforgettable look.

1.2 Overview of Sherri Hill Clothing and Fit

Sherri Hill is renowned for its elegant and stylish clothing, offering a wide range of sizes to cater to diverse body types. The brand emphasizes a flattering fit, ensuring comfort and confidence. Their dresses are designed with meticulous attention to detail, featuring various fabrics and styles to suit different preferences. From form-fitting gowns to flowing designs, Sherri Hill’s collection promises a perfect blend of fashion and functionality. By adhering to precise measurements, the brand ensures that each dress complements the wearer’s silhouette, making it a trusted choice for special occasions.

Key Measurements for Sherri Hill Dresses

The key measurements include bust, waist, and hips, ranging from size 00 to 18. Accurate measurements ensure the best fit for Sherri Hill dresses.

2.1 Bust Measurement Guidelines

For accurate sizing, measure the bust by wrapping a tape measure around the fullest part, keeping it level and comfortable. Sherri Hill dresses require precise bust measurements, ranging from 31.5″ (size 00) to 44″ (size 18). Ensure the tape isn’t too tight or loose, as this can affect fit. Proper alignment ensures the dress drapes correctly. Note that fabric type and design may influence how measurements translate to fit, so always refer to the specific size chart for the dress style you’re considering.

2.2 Waist Measurement Instructions

To measure your waist accurately for Sherri Hill dresses, wrap the tape measure around the narrowest point of your natural waistline, keeping it level and snug but not too tight. Ensure the tape is parallel to the floor for precise results. Sherri Hill waist measurements range from 23″ (size 00) to 35.5″ (size 18). Proper alignment is key to achieving the correct fit, as the waist measurement directly impacts how the dress sits on your body. Double-check the position to avoid any gaps or constriction, ensuring comfort and a flattering silhouette.

2.3 Hip Measurement Explanation

The hip measurement is a crucial factor in determining the fit of Sherri Hill dresses. To measure accurately, stand upright and place the tape measure around the fullest part of your hips, approximately 7-9 inches below your waistline. Keep the tape level and snug but not tight. Sherri Hill hip measurements range from 34.5″ (size 00) to 47″ (size 18). This measurement ensures the dress skims your body correctly, offering a balanced and flattering silhouette. Proper alignment is essential, as incorrect positioning can lead to an ill-fitting gown. Always refer to the size chart for precise guidelines.

Sherri Hill Size Chart Details

The Sherri Hill Size Chart provides precise measurements in inches and centimeters, covering bust, waist, and hip sizes from 00 to 18 for a tailored fit.

3.1 Size Chart in Inches

The Sherri Hill Size Chart in inches offers detailed measurements for sizes 00 to 18, ensuring accuracy. Bust ranges from 31.5″ (size 00) to 44″ (size 18), waist from 23″ to 35.5″, and hips from 34.5″ to 47″. This chart provides a clear guide for determining your size based on body measurements, helping you find the perfect fit for Sherri Hill dresses. Use these measurements to align your body dimensions with the corresponding size for a flattering and comfortable gown. Accurate sizing ensures a seamless and stylish look for any occasion.

3.2 Size Chart in Centimeters

The Sherri Hill Size Chart in centimeters provides precise measurements for sizes 00 to 18. Bust measurements range from 80 cm (size 00) to 112 cm (size 18), waist from 58 cm to 90 cm, and hips from 88 cm to 120 cm. This chart is particularly useful for international customers, ensuring accurate sizing. Each size corresponds to specific body measurements, allowing you to choose the perfect fit. Use these centimeter measurements to align your body dimensions with the correct size for a Sherri Hill dress. This guide helps you make informed decisions for a flattering and comfortable fit.

3.3 US and UK Size Comparisons

The Sherri Hill Size Guide offers a comparison between US and UK sizes, ensuring clarity for international customers. For instance, a US size 4 corresponds to a UK size 8, while a US size 12 aligns with a UK size 16. This comparison extends across all sizes, from 00 to 18. Bust, waist, and hip measurements are provided in both US and UK formats, allowing customers to easily determine their size regardless of region. This feature ensures a seamless shopping experience for global clients, eliminating confusion and helping them find the perfect fit effortlessly.

How to Measure Yourself Accurately

Ensure accurate measurements by using a flexible tape measure. Measure your bust over the fullest part, your natural waistline, and the widest point of your hips.

4.1 Step-by-Step Measuring Instructions

To measure yourself accurately, start by wearing a well-fitting bra and standing up straight. Use a flexible tape measure and ensure it is level and not too tight or loose. For the bust, measure around the fullest part, keeping the tape parallel to the floor. Next, measure your natural waistline, which is the narrowest point above your hips. Finally, measure the widest part of your hips, usually 7-9 inches below your waistline. Double-check your measurements in front of a mirror to ensure accuracy and consistency.

4.2 Tips for Taking Measurements Correctly

For accurate measurements, use a flexible tape measure and stand up straight. Wear a bra that fits well and avoid slouching. Measure the bust over the fullest part, keeping the tape level. For the waist, find the natural indentation and wrap the tape snugly but not tightly. When measuring hips, ensure the tape is parallel to the floor and sits at the widest point. Take measurements at least twice to confirm accuracy. If unsure, consider having someone assist you for precise results. Consistency is key to finding the perfect fit;

Size Variations Across Styles

Sherri Hill dresses may vary in fit due to fabric, design, and style differences. Always refer to the specific size chart for each dress to ensure accuracy.

5.1 Fit Differences Based on Fabric and Design

Fabric and design significantly impact the fit of Sherri Hill dresses. Stretch fabrics offer a snug, flexible fit, while structured designs provide a more tailored look. Some styles, like mermaid or ball gowns, may require precise measurements due to their form-fitting nature. Delicate fabrics, such as chiffon or satin, drape differently, affecting how the dress sits on the body. Each design and fabric combination is unique, so it’s essential to consult the specific size chart for your chosen style to ensure the best fit. This variability ensures every dress flatters your figure perfectly, regardless of the design or material.

5.2 How Style Affects Sizing

Different Sherri Hill dress styles can affect sizing due to their unique cuts and designs. For example, mermaid and trumpet styles hug the body closely, requiring precise hip and bust measurements. A-line dresses, with their flared skirts, may fit more generously through the hips. Beaded or corset-style dresses can also alter the fit, as they may provide additional structure or compression. Understanding how a specific style is designed to fit is crucial for choosing the right size, as some designs may run slightly smaller or larger than others. Always refer to the style-specific size chart for accuracy;

Choosing the Right Size for Your Body Type

Sherri Hill dresses cater to various body types, ensuring a flattering fit. Use the size guide to select styles that complement your figure for a perfect look.

6.1 Identifying Your Body Type

Understanding your body type—hourglass, pear-shaped, rectangular, or petite—is key to selecting the right Sherri Hill dress. Measure your bust, waist, and hips to determine proportions. For hourglass figures, emphasize curves with fitted styles. Pear-shaped individuals should highlight the upper body. Rectangular body types benefit from dresses that create definition. Petite frames look best in tailored fits. Use Sherri Hill’s size guide to align measurements with styles designed for your silhouette, ensuring a balanced and flattering appearance.

6.2 Selecting a Dress That Flatters Your Figure

Choosing a Sherri Hill dress that flatters your figure involves aligning the design with your body type. For hourglass figures, opt for fitted styles that accentuate curves; Pear-shaped individuals should look for A-line dresses that balance hips with a fitted bodice. Rectangular body types can add definition with ruffles or peplums, while petite frames benefit from tailored, knee-length dresses. Use the size guide to ensure proper fit and proportions, enhancing your natural silhouette for a confident, polished look. Sherri Hill’s designs cater to diverse body types, ensuring every woman feels elegant and stylish.

What to Do if You Fall Between Sizes

If you fall between sizes, consider the fabric, style, and your body type. Contact customer support for personalized guidance to ensure the best fit.

7.1 Options for Between Sizes

If your measurements fall between sizes, consider the dress style, fabric, and your body type. Opting for the larger size may provide a more comfortable fit. For tailored designs, the smaller size could work if fabric has stretch. Contact customer support for personalized advice. They can help determine the best fit based on specific styles and fabrics. Additionally, alterations can refine the fit further, ensuring the dress looks and feels perfect. Taking these steps ensures confidence and satisfaction with your Sherri Hill dress purchase.

7.2 Contacting Customer Support for Guidance

Contacting customer support is an excellent option for personalized sizing guidance. Reach out via phone or email to discuss your measurements and preferences. The knowledgeable team can help determine the best fit for your body type and desired style. They can also provide insights into fabric stretch and design specifics. Don’t hesitate to seek advice if you’re unsure or between sizes. This service ensures confidence in your choice, making your Sherri Hill dress purchase a seamless and satisfying experience.

Importance of Accurate Sizing

Accurate sizing ensures a perfect fit, enhancing confidence and comfort. Proper measurements prevent returns and alterations, guaranteeing your Sherri Hill dress looks and feels its absolute best.

8.1 Why Proper Fit Matters

A proper fit is essential for both comfort and confidence. A well-fitting dress enhances your natural silhouette, ensuring a flattering and polished appearance. Accurate measurements guarantee that the dress drapes elegantly, avoiding unflattering tightness or excessive looseness. Proper sizing also prevents discomfort during wear, allowing you to enjoy your event without restrictions. Additionally, a correct fit reflects the quality and craftsmanship of Sherri Hill designs, ensuring you feel your best. By prioritizing proper fit, you invest in a dress that not only looks stunning but also makes you feel confident and radiant.

8.2 Avoiding Returns and Alterations

Accurate sizing ensures a seamless shopping experience by minimizing the need for returns and alterations. Returns can be time-consuming and costly, while alterations may add extra expenses. By using the Sherri Hill size guide, you can select a dress that fits perfectly, eliminating the hassle of adjustments. Proper measurements guarantee a dress that aligns with your body, saving you time and effort. This approach ensures a stress-free purchase, allowing you to enjoy your dress without unnecessary delays or additional costs.

Sherri Hill Size Guide vs. Other Brands

Sherri Hill’s size guide offers detailed measurements for bust, waist, and hips, distinguishing it from other brands. Its comprehensive approach ensures accuracy and consistency across all styles.

9.1 Comparing Sherri Hill Sizes to Other Designers

Sherri Hill’s size guide is more detailed compared to other designers, offering precise measurements for bust, waist, and hips. While other brands may have similar charts, Sherri Hill’s focus on accuracy ensures a better fit. The guide accounts for fabric and style variations, which can affect sizing. Unlike some designers, Sherri Hill provides a comprehensive chart that aligns with US and UK standards, making it easier for international customers to find their size. This attention to detail sets Sherri Hill apart, ensuring consistency and reliability across all collections.

9.2 Unique Aspects of Sherri Hill Sizing

Sherri Hill’s sizing stands out for its meticulous attention to detail, offering measurements in both inches and centimeters for global accessibility. Unlike other brands, Sherri Hill’s size guide accounts for variations in fabric and design, ensuring fit accuracy across diverse styles. The guide also provides clear instructions for measuring, emphasizing the importance of accurate measurements for the best fit. This tailored approach makes Sherri Hill’s sizing system highly reliable and customer-focused, catering to a wide range of body types and preferences with precision and care.

Tips for the Perfect Fit

Ensure a flawless fit by taking accurate measurements, considering fabric stretch, and double-checking the size chart. Seek guidance if unsure for optimal comfort and style.

10.1 How to Ensure the Best Fit

Accurate measurements are key to ensuring the best fit for Sherri Hill dresses. Use a flexible tape measure and take measurements over undergarments for precision. Consider the fabric type, as stretchy materials may offer more flexibility. If your measurements fall between sizes, size up for comfort. Double-check the size chart and compare your measurements to the closest match. For added assurance, contact customer support for personalized guidance, ensuring your Sherri Hill dress flatters your figure perfectly and provides a confident, elegant look for any occasion.

10.2 Considerations for Alterations

When considering alterations for your Sherri Hill dress, ensure measurements are taken accurately to avoid unnecessary adjustments; Fabric type plays a role, as some materials are less forgiving for alterations. Compare your measurements to the size chart and opt for a size that allows for ease of modification. If you’re between sizes, sizing up may provide more flexibility for tailoring. Keep in mind that certain styles may require more alterations than others due to design complexity. Consulting a professional tailor can help achieve the perfect fit while maintaining the dress’s original elegance and structure.

The Sherri Hill Size Guide is essential for ensuring a perfect fit, helping you make informed decisions to find a dress that complements your figure, guaranteeing confidence and elegance.

11.1 Final Thoughts on Using the Sherri Hill Size Guide

Using the Sherri Hill Size Guide ensures a perfect fit, helping you make informed decisions for a dress that complements your body. By accurately measuring and comparing sizes, you can avoid returns and alterations, saving time and stress. The guide is tailored to Sherri Hill’s unique designs, with detailed measurements for bust, waist, and hips. Remember, proper sizing enhances comfort and confidence, making your dress truly unforgettable. Always refer to the guide before ordering to ensure the best possible fit for your special occasion.

11.2 Encouragement to Use the Guide Effectively

Embrace the Sherri Hill Size Guide to unlock a seamless shopping experience. By taking a few minutes to measure and compare sizes, you ensure a flattering fit that boosts confidence and style. Remember, the guide is tailored to Sherri Hill’s unique designs, offering precise measurements to suit every body type. Don’t hesitate to reach out for support if needed, and trust the guide to help you find a dress that makes you feel extraordinary. Your perfect fit is just a few steps away—use the guide wisely and enjoy a stress-free, stylish journey!

dyna glo kerosene heater user manual

Welcome to the Dyna Glo Kerosene Heater User Manual guide. This manual provides essential information for safe, efficient, and proper operation of your Dyna Glo kerosene heater. Always read carefully to ensure optimal performance and safety.

Overview of the Dyna Glo Kerosene Heater

The Dyna Glo Kerosene Heater is a reliable and efficient heating solution designed for portable use. Popular models like the KFA400DGD, WK95C6C, and RMC-95C7 offer varying BTU outputs and fuel capacities. These heaters are known for their durability, portability, and ability to provide consistent heat in well-ventilated spaces. They feature advanced wick designs and burner chambers for optimal performance. Always refer to the user manual for specific model details, as each heater may have unique characteristics and requirements for safe operation.

Importance of Reading the User Manual

Reading the Dyna Glo Kerosene Heater user manual is crucial for safe and efficient operation. It provides detailed instructions for assembly, maintenance, and troubleshooting. The manual highlights critical safety precautions, such as proper ventilation and fuel usage, to avoid risks like indoor air pollution. Understanding the guidelines ensures optimal performance and longevity of the heater. Failure to follow instructions can lead to unsafe conditions and potential damage. Always refer to the manual for model-specific advice to maximize benefits and ensure safe usage.

Safety Precautions

Always follow safety guidelines to ensure safe operation. Ensure proper ventilation to prevent indoor air pollution. Never use improper fuels or refill while the heater is hot or operating. Keep flammable materials away and maintain a safe distance from children and pets. Regularly inspect the heater for damage and follow all warnings provided in the manual to avoid potential hazards.

General Safety Warnings

Always follow safety guidelines to ensure safe operation. Never refill the heater while it is operating or still hot. Keep children, pets, and flammable materials away. Avoid using improper fuels like gasoline or paint thinners, as they pose serious risks. Ensure proper ventilation to prevent indoor air pollution and carbon monoxide buildup. Regularly inspect the heater for damage or wear. Follow all warnings and instructions provided in the manual to minimize hazards and ensure safe usage.

  • Never touch the heater during operation.
  • Keep the heater away from combustible materials.
  • Ensure proper ventilation to avoid air quality issues.

Risk of Indoor Air Pollution

Using a kerosene heater indoors poses risks of air pollution, including carbon monoxide buildup. Ensure proper ventilation by providing at least three square feet of ventilation area. Prolonged use in poorly ventilated spaces can lead to respiratory issues and health hazards. Always monitor indoor air quality and follow ventilation guidelines to minimize risks. Failure to ventilate adequately may result in dangerous fumes accumulating, creating unsafe conditions. Always prioritize ventilation to ensure safe and healthy indoor air quality while operating the heater.

  • Avoid using the heater in enclosed or poorly ventilated spaces.
  • Open windows or doors to maintain airflow.
  • Monitor for signs of inadequate ventilation, such as dizziness or headaches.

Handling Cautions

Handle the heater with care to avoid accidents. Never touch the heater while it is in operation or hot, as it can cause burns. Keep children, pets, and flammable materials at a safe distance. Avoid overhandling the heater, especially when refueling or adjusting settings. Always turn off the heater and allow it to cool before performing maintenance or storage. Improper handling can lead to injuries or malfunctions. Ensure all parts are securely tightened and the unit is stable before use. Follow the manufacturer’s guidelines for safe handling practices to prevent accidents.

  • Never touch hot surfaces or components during operation.
  • Keep the heater away from children and flammable materials.
  • Allow the heater to cool completely before handling.

Understanding Your Dyna Glo Kerosene Heater

Your Dyna Glo kerosene heater is designed for efficient and reliable heat production. It features a robust construction, a wick system, and a burner chamber for optimal performance.

Key Components of the Heater

Your Dyna Glo kerosene heater consists of essential components designed for safe and efficient operation. The burner chamber houses the wick, which draws fuel from the tank. The ignition system lights the wick, producing a controlled flame. The heat exchanger distributes warm air, while the fuel tank holds the kerosene. Ventilation openings ensure proper airflow, and safety features like emergency shut-offs prevent accidents. Regular maintenance of these parts is crucial for optimal performance and longevity of the heater.

Model-Specific Features

Dyna Glo kerosene heaters offer model-specific features tailored for efficiency and safety. The KFA400DGD model includes a 24-page manual, while the WK95C6C features a portable design with precise temperature control. The RMC-95C7 boasts advanced ignition systems and a robust fuel tank. Each model is designed to meet unique heating needs, ensuring reliable performance and user convenience. Always refer to your specific model’s manual for detailed instructions on its unique features and operation guidelines to maximize functionality and safety.

Fuel Requirements

Use only high-quality, red-dyed 1-K kerosene fuel for optimal performance. Never use gasoline, benzene, or other flammable liquids, as they pose serious safety risks and damage the heater.

Recommended Fuel Types

For optimal performance and safety, use only high-quality, red-dyed 1-K kerosene fuel in your Dyna Glo kerosene heater. This fuel type is specifically designed for kerosene heaters and ensures clean, efficient combustion. Avoid using ungraded or untreated kerosene, as it may contain impurities that can damage the heater or produce harmful emissions. Never substitute with gasoline, diesel, or other flammable liquids, as these can cause malfunctions, fire hazards, or environmental contamination. Always refer to the user manual for specific fuel recommendations tailored to your heater model.

Incorrect Fuel Usage Warnings

Never use gasoline, diesel, benzene, paint thinners, or other flammable liquids in your Dyna Glo kerosene heater. These substances are highly dangerous and can cause explosions, fires, or toxic emissions. Using improper fuel voids the warranty, damages the heater, and poses serious health and safety risks. Always stick to the recommended 1-K kerosene, as specified in the manual. Ignoring these guidelines can lead to hazardous situations, including carbon monoxide poisoning or unit malfunction. Proper fuel selection is critical for safe and efficient operation.

Operating Instructions

Always follow the user manual for safe and efficient operation. Use correct fuel, ensure proper ventilation, and adhere to ignition guidelines for optimal performance.

Assembly and Initial Setup

Begin by carefully unboxing and inventorying all components. Attach the legs securely to the heater base using the provided hardware. Next, install the wick according to the manual’s instructions, ensuring it is properly seated. Connect the fuel tank to the burner assembly, making sure all connections are tight. Fill the tank with the recommended kerosene type, avoiding overfilling. Finally, perform a leak check and ensure all parts are correctly aligned. Always follow the manual’s step-by-step guide for safe and proper assembly.

Ignition and Start-Up Process

Before ignition, ensure the heater is on a level surface and away from flammable materials. For models with a battery-powered ignition system, insert two D-cell batteries and connect the wires. Press the ignition button while gently lifting the manual arm to raise the burner. Once the wick is exposed, light it according to the manufacturer’s instructions. Allow the heater to reach full combustion before adjusting the wick height. If the heater doesn’t ignite, wait 10 minutes before retrying. Always follow the manual’s ignition procedure to ensure safe and efficient start-up.

Proper Usage Guidelines

Always use the heater in well-ventilated areas to prevent indoor air pollution. Ensure the room has at least three square feet of ventilation. Use only high-quality, 1-K kerosene or red dyed kerosene for optimal performance. Avoid using gasoline, benzene, or other flammable liquids. Keep children and pets at a safe distance. Monitor flame height and adjust the wick as needed for efficient burning. Never leave the heater unattended or running continuously. Turn off the heater and allow it to cool before refueling. Follow all manufacturer instructions for operation to ensure safety and efficiency.

Maintenance and Care

Regularly clean the heater and inspect for damage or wear. Replace the wick as needed and ensure proper storage when not in use for optimal performance.

Regular Cleaning Procedures

Regular cleaning is crucial for maintaining efficiency and safety. Clean the burner chamber and surrounding areas daily to remove soot and debris. Use a soft brush or vacuum to gently remove dust and dirt. Check the wick regularly and ensure it is free from contaminants. Clean the fuel tank and cap to prevent dust buildup. Always allow the heater to cool completely before cleaning to avoid burns or damage. Proper maintenance ensures optimal performance and longevity of your Dyna Glo kerosene heater.

Wick Replacement and Care

Regular wick maintenance ensures optimal performance and safety; Replace the wick every 1-3 years or as specified in the manual. Always turn off the heater and allow it to cool completely before handling the wick. Use only genuine Dyna Glo replacement wicks to maintain efficiency and safety. Never clean the wick, as this can damage it. Refer to the user manual for model-specific wick replacement instructions. Proper wick care extends the heater’s lifespan and ensures reliable operation during cold weather conditions.

Storage and Winterization Tips

Proper storage and winterization are crucial for maintaining your Dyna Glo kerosene heater’s performance. Drain all fuel before storage to prevent degradation and contamination. Clean the heater thoroughly, paying attention to the burner and wick areas. Ensure the unit is completely dry to avoid rust. Store in a cool, dry, well-ventilated area away from flammable materials. Check for any damage or pests before storing. Follow the user manual for specific instructions to ensure safety and longevity. Proper storage ensures your heater remains ready for the next use.

Troubleshooting Common Issues

Identify and resolve issues like fuel-related problems, ignition malfunctions, or operational difficulties. Check fuel quality, clean components, and ensure proper assembly. Refer to the manual for detailed solutions.

Identifying and Resolving Fuel-Related Problems

Ensure proper fuel usage by selecting the recommended kerosene type. Improper fuel can cause performance issues or safety hazards. For models like KFA400DGD and WK95C6C, use only 1-K kerosene. Avoid gasoline or other flammable liquids. If the heater doesn’t ignite, check fuel quality and tank levels. Contaminated or old fuel may require draining and refueling. Refer to the manual for specific guidance on diagnosing and resolving fuel-related issues to maintain efficiency and safety.

Addressing Ignition and Flame Issues

If your Dyna Glo kerosene heater fails to ignite or produces an uneven flame, ensure proper assembly and fuel usage. Check the wick for correct installation and cleanliness. Ensure the burner chamber is free from debris. If the flame is unstable, inspect for drafts or improper ventilation. Never touch hot surfaces during operation; For persistent issues, consult the user manual or contact customer support. Proper maintenance and adherence to guidelines will help resolve ignition and flame-related problems effectively.

Dealing with Operational Malfunctions

If your Dyna Glo kerosene heater experiences operational issues, start by checking for blockages in the burner or fuel line. Ensure proper fuel levels and correct wick installation. Avoid using incorrect fuels like gasoline, as they can damage the heater. If the heater shuts off unexpectedly, verify ventilation and ensure no drafts are present. For complex malfunctions, refer to the user manual or contact professional support; Regular maintenance and proper usage can prevent most operational problems, ensuring safe and efficient heating performance. Always follow safety guidelines to avoid accidents.

Ventilation and Air Quality

Proper ventilation is crucial to prevent indoor air pollution. Use your Dyna Glo kerosene heater in well-ventilated areas, ensuring at least three square feet of ventilation to maintain air quality and safety.

Minimum Ventilation Requirements

For safe operation, ensure your Dyna Glo kerosene heater is used in well-ventilated areas. Maintain at least three square feet (2,800 sq. cm) of ventilation to prevent carbon monoxide buildup. Keep windows or doors slightly open to ensure proper airflow. Never operate the heater in enclosed or poorly ventilated spaces, as this can lead to dangerous indoor air pollution. Always follow the manufacturer’s guidelines for ventilation to ensure a safe and healthy environment while using your heater.

Monitoring Indoor Air Quality

Regularly monitor indoor air quality when using your Dyna Glo kerosene heater to ensure a safe environment. Look for signs of poor ventilation, such as fogging windows or a stuffy atmosphere. Prolonged use without proper airflow can lead to carbon monoxide buildup, posing serious health risks. Install a carbon monoxide detector and ensure adequate ventilation at all times. Always prioritize air quality to maintain a safe and comfortable space while operating your heater.

Storage and Portability

Proper storage and portability of your Dyna Glo kerosene heater are crucial for safety and longevity. Always drain fuel before storing and clean the heater thoroughly. Store in a dry, well-ventilated area away from flammable materials. When transporting, ensure the heater is cool and securely packed to prevent damage. Follow manufacturer guidelines for safe handling and relocation to maintain optimal performance and safety.

Safe Storage Practices

When storing your Dyna Glo kerosene heater, ensure it is completely cool and free from fuel. Drain all remaining kerosene into an approved container and clean the heater thoroughly. Store in a dry, well-ventilated area away from flammable materials and out of reach of children; Use the original packaging or a sturdy cover to protect the heater from dust and moisture. Always store the heater in an upright position to prevent fuel residue from leaking. Follow these practices to maintain your heater’s condition and ensure safety during storage.

Transporting the Heater Safely

Transporting your Dyna Glo kerosene heater requires careful attention to ensure safety. Always ensure the heater is completely cool and free from any fuel before moving. Use a sturdy, well-ventilated container or the original packaging to protect the unit during transport. Avoid exposing the heater to direct sunlight or moisture. Keep it upright to prevent any residual fuel from leaking. Never transport the heater while it is in operation or still hot. Always secure the heater to prevent movement during transit, and keep it away from flammable materials. Follow these guidelines to ensure safe and damage-free transportation.

Regulatory and Compliance Information

Ensure your Dyna Glo kerosene heater complies with local and national safety regulations. Adhere to emissions standards and manufacturer guidelines for safe, legal operation.

Local and National Safety Standards

Your Dyna Glo kerosene heater must comply with local and national safety regulations. Ensure it meets emissions standards and efficiency requirements. Always use the heater in well-ventilated areas to prevent air pollution. Proper installation and maintenance are crucial to avoid hazards. Refer to the manual for specific guidelines tailored to your model, such as the KFA400DGD or WK95C6C. Compliance ensures safe operation and adherence to environmental laws. Failure to follow standards may result in legal consequences or safety risks. Always verify local regulations before use.

Environmental Regulations

Ensure your Dyna Glo kerosene heater complies with environmental regulations to minimize ecological impact. Proper disposal of waste materials, such as used wicks and fuel, is essential. Always use recommended fuels like 1-K kerosene to reduce emissions. Follow local and national guidelines for emissions control. Refer to your model-specific manual, such as the KFA400DGD or RMC-95C7, for eco-friendly operation tips. Adhering to these regulations helps preserve air quality and reduces environmental harm. Proper usage and disposal practices are critical for sustainability.

Environmental Considerations

Using a Dyna Glo kerosene heater requires attention to environmental impact. Always use 1-K kerosene to minimize emissions. Proper disposal of waste materials is crucial to reduce environmental harm.

Emissions and Air Quality Impact

Using a Dyna Glo kerosene heater can release emissions, including carbon monoxide and particulate matter, which may affect indoor and outdoor air quality. Proper ventilation is essential to minimize these impacts. Always use 1-K kerosene, as it produces fewer pollutants compared to other fuels. Regular maintenance, such as cleaning the wick and ensuring proper combustion, helps reduce emissions. Follow manufacturer guidelines to minimize environmental impact and ensure safe operation. Improper fuel use or poor ventilation can lead to harmful air quality issues, emphasizing the importance of adhering to safety and operational standards.

Proper Disposal of Waste Materials

Proper disposal of waste materials from your Dyna Glo kerosene heater is crucial for environmental protection. Dispose of soot, used wicks, and other waste through authorized facilities. Never discard hazardous materials in regular trash or drains. Leftover kerosene should be taken to a hazardous waste collection center. Always follow local regulations and manufacturer guidelines for waste disposal. Proper disposal ensures environmental safety and prevents contamination. Adhere to these practices to maintain a responsible and eco-friendly approach to heater maintenance and operation.

Model-Specific Instructions

This section provides detailed instructions for specific Dyna Glo kerosene heater models, including KFA400DGD, WK95C6C, and RMC-95C7. Each model has unique features and requirements for safe operation.

Dyna-Glo KFA400DGD Operating Guide

The Dyna-Glo KFA400DGD operating guide provides detailed instructions for the 24-page manual, covering installation, fuel requirements, and ignition processes. It emphasizes using only 1-K kerosene and avoiding hazardous fuels like gasoline. The guide outlines proper assembly, safety precautions, and maintenance routines to ensure efficient and safe operation. Users are warned to never refill the tank while the heater is hot or in use. Regular cleaning and wick replacement are highlighted for optimal performance. Follow the manual for troubleshooting and to maintain the heater’s longevity and efficiency.

Dyna-Glo WK95C6C Maintenance Tips

Regular maintenance is crucial for the Dyna-Glo WK95C6C heater’s performance. Clean the burner and wick periodically to ensure proper combustion. Store the heater in a dry, well-ventilated area during off-seasons, ensuring the fuel tank is empty. Always follow the manual’s guidelines for wick replacement and burner care. Proper ventilation is essential to prevent indoor air pollution. Adhere to the manufacturer’s instructions for troubleshooting and part replacements to maintain safety and efficiency. Regularly inspect and clean the air vents to ensure optimal airflow and heating performance.

Dyna-Glo RMC-95C7 Troubleshooting

For the Dyna-Glo RMC-95C7, common issues include ignition problems or uneven flames. Ensure the wick is clean and properly aligned. Check for blockages in the burner or air vents. If the heater doesn’t start, verify fuel quality and tank levels. Avoid using incorrect fuels like gasoline or paint thinners, as they can damage the unit. Proper ventilation is essential to prevent carbon monoxide buildup. Refer to the manual for specific troubleshooting steps and always follow safety guidelines when addressing malfunctions.

Importance of the User Manual

The user manual is crucial for understanding proper assembly, maintenance, and operation of your Dyna Glo kerosene heater. It ensures safety, efficiency, and longevity of the appliance. Failure to follow guidelines can lead to hazards and reduced performance, emphasizing the need to read and adhere to the instructions carefully for optimal results and to prevent potential risks associated with improper use.

Consequences of Improper Use

Improper use of the Dyna Glo kerosene heater can lead to severe safety risks, including fires, burns, and carbon monoxide poisoning. Using incorrect fuel types or ignoring maintenance guidelines can result in equipment damage or failure. Failure to follow ventilation requirements may cause indoor air pollution, posing health hazards. Additionally, improper operation can void the warranty and lead to costly repairs. Always adhere to the manual’s instructions to ensure safe and efficient heating while avoiding potential dangers associated with misuse. Proper usage is critical to preventing accidents and ensuring longevity of the heater.

Maximizing Heater Efficiency

To maximize the efficiency of your Dyna Glo kerosene heater, ensure proper fuel usage and regular maintenance. Always use the recommended kerosene type and maintain the wick in good condition. Adjust the burner correctly for optimal combustion. Keep the heater clean and free from debris to ensure proper airflow. Monitor fuel levels and refill when necessary to avoid operational disruptions. By following these guidelines, you can achieve consistent heating performance while minimizing fuel consumption and ensuring safe operation.

Final Safety Reminders

Always prioritize safety when operating your Dyna Glo kerosene heater. Ensure proper ventilation to avoid indoor air pollution. Never refill the tank while the heater is hot or in use. Keep children and flammable materials away. Use only recommended fuel types, such as 1-K kerosene, and avoid hazardous substitutes. Regularly inspect and maintain the heater to prevent malfunctions. Store the heater and fuel safely when not in use. Follow all manufacturer guidelines to ensure safe and efficient operation. Consult the manual for detailed instructions and precautions to avoid potential hazards.

Encouragement for Proper Usage

Adhering to the guidelines in this manual ensures your Dyna Glo kerosene heater operates safely and efficiently. Proper usage not only prolongs the heater’s lifespan but also maximizes its performance. By following fuel recommendations and maintenance tips, you can enjoy reliable heat while minimizing risks. Always prioritize ventilation and safety precautions to create a comfortable environment. Regular upkeep and correct fuel selection are key to optimal functionality. Embrace these practices to get the most out of your heater and ensure years of trouble-free service.

pocket guide to public speaking

Public speaking can be daunting, but resources such as “A Pocket Guide to Public Speaking” offer practical advice. These guides instill confidence, reducing anxiety, and providing tools for effective speech preparation.

Overcoming Fear and Anxiety

Many individuals share a common fear: public speaking. It often tops the list of anxieties, but it’s crucial to remember that this fear can be managed. A “Pocket Guide to Public Speaking” often provides strategies to combat this anxiety, offering practical steps to build confidence and reduce nervousness.

These guides emphasize preparation as a key tool. By thoroughly knowing your material and practicing your speech, you can significantly alleviate anxiety. Familiarizing yourself with the venue and even greeting audience members beforehand can also help calm your nerves.

Furthermore, understanding that some nervousness is normal and can even enhance your performance is essential. Techniques like deep breathing and positive self-talk are valuable in managing anxiety. These resources provide a foundation for effective public speaking, transforming fear into a manageable challenge.

Speech Preparation

Effective speech preparation is essential. It includes research, organization, and understanding your audience. Resources like “A Pocket Guide to Public Speaking” offer practical advice on crafting compelling speeches.

Audience Analysis

Understanding your audience is paramount to delivering a successful speech. “A Pocket Guide to Public Speaking” emphasizes the importance of audience analysis, helping speakers tailor their message effectively.

To truly connect, consider demographics, interests, and prior knowledge. Adapt your language, examples, and overall approach to resonate with your listeners. Are they experts or novices? What are their biases?

Effective audience analysis informs your topic selection, organizational structure, and delivery style. A well-analyzed audience is more receptive and engaged, increasing the impact of your speech. Neglecting this step can lead to a disconnect, diminishing your message’s effectiveness and overall impact. Remember, a speech is not about you, it’s about them.

Research and Topic Selection

Selecting a relevant topic and conducting thorough research are crucial steps in speech preparation. “A Pocket Guide to Public Speaking” guides speakers through this process, ensuring a well-informed and engaging presentation.

Choose a topic that aligns with your interests and expertise, making the research process more enjoyable and authentic. Explore various sources, including books, articles, and reputable online resources, to gather comprehensive information.

Organize your research findings systematically, noting key points and supporting evidence. A well-researched speech demonstrates credibility and allows you to speak confidently on the subject. Remember to cite your sources properly, maintaining academic integrity and giving credit where it’s due. Don’t underestimate the power of preparation!

Effective organization is key to a compelling speech. “A Pocket Guide to Public Speaking” emphasizes a clear structure: introduction, body, and conclusion. This framework ensures coherence and audience comprehension.

The introduction grabs attention, states the thesis, and previews main points. The body develops these points with evidence and examples, logically arranged. Transitions connect ideas smoothly, guiding the listener.

Consider using organizational patterns discussed in guides, adapting them to your topic and audience. This structured approach transforms information into a cohesive, persuasive, and easily digestible presentation, boosting your confidence and effectiveness.

Delivery Techniques

Delivery techniques are crucial for engaging your audience. Effective verbal and nonverbal communication enhances your message. Practice and refine these techniques to present confidently and connect with your listeners.

Verbal Delivery (Voice Modulation, Pace)

Verbal delivery significantly impacts how your message is received. Mastering voice modulation involves varying your pitch, tone, and volume to maintain audience interest and emphasize key points. A monotonous voice can quickly lose listeners, while dynamic modulation keeps them engaged.

Pace is another crucial element. Speaking too quickly can overwhelm the audience, making it difficult to follow your arguments. Conversely, speaking too slowly can bore them. Aim for a moderate pace that allows listeners to process information comfortably. Strategic pauses can also be powerful, creating emphasis and allowing the audience time to reflect.

A “Pocket Guide to Public Speaking” likely offers practical tips for controlling these aspects, helping speakers project confidence and clarity through their voice. Practice is key to developing effective verbal delivery.

Nonverbal Communication (Eye Contact, Gestures)

Nonverbal communication profoundly influences your speech’s impact. Eye contact connects you with your audience, conveying sincerity and confidence. Scan the room, making brief but meaningful eye contact with individuals. Avoid staring or focusing solely on one person, which can make others feel excluded. Effective eye contact keeps the audience engaged and receptive to your message.

Gestures should be natural and purposeful, reinforcing your words. Avoid fidgeting or distracting movements. Use hand gestures to emphasize points, illustrate ideas, and convey enthusiasm. Ensure your gestures are visible to the entire audience and appropriate for the setting. A “Pocket Guide to Public Speaking” likely offers advice on using nonverbal cues effectively, helping speakers enhance their delivery and connect with their audience on a deeper level. Practice integrating gestures into your speech for a polished and engaging presentation.

Utilizing Visual Aids

Visual aids enhance presentations, but should be used strategically. According to resources like “A Pocket Guide to Public Speaking,” effective visuals clarify your message and engage the audience, aiding comprehension.

Graphics and Presentation Enhancement

Graphics play a crucial role in enhancing presentations, transforming them from mere verbal deliveries into engaging experiences. Guides like “A Pocket Guide to Public Speaking” emphasize the importance of thoughtfully integrating visuals to amplify your message. Effective graphics clarify complex information, making it more accessible and memorable for the audience.

When selecting graphics, consider their relevance, clarity, and visual appeal. Charts, graphs, images, and videos can be powerful tools, but they must be directly related to your topic and easy to understand at a glance. Avoid overwhelming the audience with too much information or using distracting animations.

Furthermore, ensure that your graphics are visually consistent with your overall presentation style. Use a consistent color palette, font, and layout to create a cohesive and professional look. Remember, graphics should support your speech, not overshadow it.

Speech Types

Speeches come in diverse forms, with guides like “A Pocket Guide to Public Speaking” covering various types. These include informative and persuasive speeches, each serving distinct purposes and requiring tailored approaches.

Informative Speeches

Informative speeches aim to educate an audience on a specific topic. “A Pocket Guide to Public Speaking” often includes guidance on crafting such speeches, emphasizing clarity and accuracy. The goal is to enhance audience understanding, not to persuade. Effective informative speeches require thorough research and well-organized content. They often use visuals to aid comprehension.

Speakers should consider their audience’s existing knowledge, tailoring the speech to their level of understanding. Examples, analogies, and real-world applications can make the information more relatable. Clear definitions of key terms are crucial. The guide typically offers tips on structuring an informative speech, ensuring a logical flow of information.

Furthermore, the guide will outline how to avoid overwhelming the audience with too much detail, focusing on the most essential points.

Persuasive Speeches

Persuasive speeches aim to influence an audience’s beliefs or actions. A “Pocket Guide to Public Speaking” offers strategies for crafting compelling persuasive arguments. These speeches require a clear understanding of the audience’s values and attitudes. Speakers must establish credibility and build trust to effectively persuade.

The guide will help in selecting appropriate persuasive strategies, such as appealing to emotions or using logical reasoning. It emphasizes the importance of supporting claims with strong evidence and credible sources. The guide often provides examples of effective persuasive speech structures, including problem-solution or Monroe’s Motivated Sequence.

Ethical considerations are crucial in persuasive speaking, and the guide highlights the importance of honesty and transparency. It advises speakers on how to address counterarguments and potential objections from the audience. Adapting to the audience’s reactions and adjusting the message accordingly is also key to a successful persuasive speech.

Practice and Refinement

Practice and refinement are crucial for delivering a successful speech. “A Pocket Guide to Public Speaking” emphasizes the importance of rehearsing your speech multiple times. Practice helps in identifying areas that need improvement, such as pacing, clarity, or delivery. It allows you to become more comfortable with the material and reduce anxiety.

Refinement involves seeking feedback from others and making adjustments based on their suggestions. Recording yourself speaking can also be helpful in identifying areas for improvement. Paying attention to both verbal and nonverbal communication is essential.

The guide often suggests practicing in front of a mirror or with a small group of friends or colleagues. It may also provide tips on how to manage nervousness and stay calm during the speech. Continuous practice and refinement will increase confidence and ensure a polished, impactful delivery. The more you rehearse, the more natural and engaging your speech will become.

audi s3 manual transmission

Audi S3 Manual Transmission: A Comprehensive Guide

The Audi S3, particularly those equipped with a manual transmission, offers an engaging driving experience. This guide delves into the nuances of the S3 manual, covering common issues, maintenance, and overall performance for enthusiasts and owners alike.

The Audi S3 with a manual transmission provides a unique blend of performance and driver engagement. While both automatic and manual versions exist, the manual S3 is known for its direct connection and control. Early signs of issues can manifest as rough shifting or gear slippage, impacting the overall driving experience. Regular maintenance, especially fluid checks, is crucial for preserving the transmission’s health.

Understanding potential problems like clutch wear in older models is vital for owners. The manual gearbox, when properly maintained, offers an exciting alternative to automatic systems. Addressing concerns promptly ensures a satisfying and reliable driving experience with your Audi S3.

Common Issues with Audi S3 Manual Transmissions

Audi S3 manual transmissions can face problems such as rough shifting and gear slippage. Clutch issues, especially in older models, also arise. Regular maintenance is key to mitigating these potential problems.

Rough Shifting and Gear Slippage

Rough shifting and gear slippage are common complaints among Audi S3 manual transmission owners. These issues often manifest as difficulty engaging gears smoothly or the transmission popping out of gear during acceleration. Several factors contribute to these problems, including worn synchronizers, low or contaminated transmission fluid, or internal damage to the gearbox.

Dirty or low transmission fluid can exhibit the same symptoms as more serious transmission problems, emphasizing the importance of regular fluid checks. Some owners have reported experiencing mild delays during shifting, while others describe occasional power blips, especially in specific gears. Addressing these symptoms promptly can prevent further damage and ensure smoother operation.

Clutch Problems in Older Models

Older Audi S3 models with manual transmissions are particularly susceptible to clutch-related issues. Common problems include a slipping clutch, difficulty engaging gears, and unusual noises during clutch operation. These issues often stem from normal wear and tear, especially in vehicles with higher mileage or those subjected to aggressive driving habits.

A worn clutch disc, failing pressure plate, or a release bearing can all contribute to these symptoms. Some owners have also reported issues with the clutch master or slave cylinders, leading to inconsistent clutch pedal feel and engagement. Addressing these problems promptly is crucial to prevent further damage to the transmission and ensure optimal driving performance. Regular inspection and timely replacement of worn clutch components are essential for maintaining the reliability of older S3 models.

Symptoms of Transmission Problems

Identifying transmission problems early is crucial. Watch for difficulty shifting, unusual noises from the gearbox, gear slippage, or a burning smell. These symptoms often indicate underlying issues requiring prompt attention.

Difficulty Shifting Gears

Experiencing difficulty shifting gears in your Audi S3 manual transmission can manifest in several ways. You might encounter stiffness when trying to engage a gear, or notice a grinding noise during the shifting process. Another telltale sign is hesitation or resistance when moving the gear lever. These issues could stem from various factors, including worn synchronizers, low or contaminated transmission fluid, or internal damage within the gearbox.

Addressing these symptoms promptly is essential to prevent further damage and ensure smooth operation of your S3’s manual transmission. Ignoring these signs can lead to more extensive and costly repairs down the line.

Unusual Noises from the Gearbox

Unusual noises emanating from the gearbox of your Audi S3 manual transmission should never be ignored. These sounds can serve as crucial indicators of underlying issues that require immediate attention. A common noise is a whining sound, often noticeable during acceleration or deceleration, which may point to worn bearings within the transmission. Grinding noises, especially when shifting gears, often indicate worn synchronizers or damaged gears.

Rattling sounds, on the other hand, could suggest loose components or internal damage. If you detect any of these unusual noises, it’s essential to seek professional diagnosis. Delaying inspection and repair can result in more severe damage and costly repairs to your S3’s manual transmission.

Maintenance and Care for Manual Transmissions

Proper maintenance is crucial for the longevity of your Audi S3’s manual transmission. Regular fluid checks and timely replacements are vital. Addressing issues early prevents significant damage and ensures optimal performance.

Importance of Regular Fluid Checks

Regular fluid checks are paramount for maintaining the health and performance of your Audi S3 manual transmission. Like engine oil, transmission fluid degrades over time, losing its lubricating properties and accumulating debris. This degradation can lead to increased friction, heat buildup, and ultimately, premature wear of internal components.

Dirty or low transmission fluid can manifest as rough shifting, gear slippage, or unusual noises from the gearbox. Consistent monitoring and timely fluid changes, as recommended by Audi, ensure smooth operation and protect against costly repairs. Neglecting fluid checks can exacerbate existing issues and shorten the lifespan of your transmission, impacting overall driving experience.

Performance and Driving Experience

The Audi S3 manual transmission delivers an engaging and satisfying driving experience. Many enthusiasts prefer the direct control and connection it offers compared to automatic options, enhancing the car’s performance feel;

The Excitement of Manual vs. Automatic

The debate between manual and automatic transmissions in performance vehicles like the Audi S3 rages on, fueled by passionate opinions on both sides. For many drivers, the manual transmission offers a uniquely engaging experience, fostering a deeper connection with the car. The ability to precisely control gear changes provides a sense of mastery and involvement that automatics, even advanced ones like DSG, often lack.

Manual transmissions are often favored for their ability to provide more control over the engine’s power band, allowing drivers to tailor their driving experience to the road and conditions. Shifting gears manually becomes an integral part of the driving experience, enhancing the feeling of speed and responsiveness; While modern automatics offer impressive performance and convenience, the visceral thrill of a well-executed downshift and the satisfying snick of a perfectly engaged gear are experiences that remain unique to manual transmissions. The debate continues, but the allure of the manual remains strong for those seeking an intimate connection with their machine.

Troubleshooting Guide

This section provides guidance on diagnosing common issues with the Audi S3 manual transmission. We will cover identifying symptoms and potential causes to help you address problems effectively.

Diagnosing Transmission Issues

When diagnosing issues with your Audi S3 manual transmission, start by observing symptoms like rough shifting or gear slippage. Difficulty shifting gears or unusual noises from the gearbox are key indicators. Check the transmission fluid level and condition, as low or dirty fluid can mimic transmission problems.

If you experience occasional power blips, especially in specific gears, consider factors like wet roads and potential gear-specific issues. A thorough inspection, possibly involving a mechanic, is crucial for accurate diagnosis. Listen for rattling from the gearbox and ensure regular oil and filter changes are performed.

Remember that symptoms can sometimes overlap, so a systematic approach is necessary.

Audi A3/S3 8L Manual Transmission specifics

The Audi A3/S3 8L, particularly models with manual transmissions, are known for potential clutch and transmission issues as they age. Addressing these concerns promptly is crucial for maintaining optimal performance.

Clutch and Transmission Issues

The Audi A3/S3 8L with a manual transmission can experience clutch and transmission issues as the vehicle ages. Rough shifting or gear slippage are common concerns in both automatic and manual versions. Early symptoms of transmission trouble include difficulty shifting gears smoothly. Listen for unusual noises from the gearbox that may indicate underlying problems.

Clutch problems can manifest as a mild delay in shifting. The clutch may seem fine initially, but issues can arise under stress. Rattling from the manual gearbox should also be investigated. Regular maintenance, including fluid checks, is crucial to prevent and address these issues. Addressing them promptly can ensure a longer lifespan.

okuma guide select swimbait rod

Okuma Guide Select Swimbait Rod: An Overview

The Okuma Guide Select Swimbait Rod is designed for swim bait anglers․ It features quality components․ These rods are budget-friendly, offering great value․ Anglers appreciate its functionality and reasonable price․ These are built for big baits․

Key Features of Okuma Guide Select Swimbait Rods

These rods boast IM-8 graphite blanks reinforced with woven carbon․ Fuji Alconite guide inserts are braid-compatible․ Premium cork fore and rear grips offer comfort․ Fuji reel seats ensure secure reel placement․ Stainless steel hook keepers provide convenience․

IM-8 Graphite Blank Construction

The foundation of the Okuma Guide Select Swimbait Rod’s performance lies in its IM-8 graphite blank construction․ This material choice provides a crucial balance of sensitivity, power, and lightweight feel, essential for anglers who spend long hours casting and retrieving swimbaits․ The IM-8 graphite offers excellent responsiveness, allowing anglers to detect subtle strikes and maintain constant contact with their lure․

The graphite blank’s inherent strength ensures the rod can handle the weight and resistance of larger swimbaits, preventing premature fatigue during extended use․ The construction technique enhances the rod’s overall durability․

This construction allows for efficient energy transfer during the cast, increasing casting distance and accuracy․ This is a key advantage when targeting fish in expansive waters or when precise lure placement is critical․ The IM-8 graphite blank is a hallmark of the Okuma Guide Select Swimbait Rod․

Fuji Alconite Guide Inserts

The Okuma Guide Select Swimbait Rod incorporates Fuji Alconite guide inserts, a crucial component for optimizing line management and casting performance․ Fuji Alconite guides are known for their exceptional smoothness and durability․ This reduces friction during casts, allowing for greater casting distance and accuracy․ The guides are also braid-compatible, accommodating anglers who prefer braided lines for their strength and sensitivity․

These guide inserts dissipate heat effectively, minimizing the risk of line damage from friction during long fights with powerful fish․ The lightweight Fuji frames further contribute to the rod’s overall balance and sensitivity, enhancing the angler’s feel for the lure and any potential strikes․

The quality and reliability of Fuji components ensures the rod performs consistently over time, even under demanding fishing conditions․ These guides are an essential feature of the Okuma Guide Select Swimbait Rod․

Premium Cork Grips

The Okuma Guide Select Swimbait Rod features premium cork grips, which provide anglers with enhanced comfort, control, and sensitivity․ Cork is a naturally buoyant and lightweight material, making it ideal for fishing rod handles․ The premium cork used in these grips offers a comfortable and secure hold, even in wet conditions․ This is essential for maintaining a firm grasp while casting and retrieving large swimbaits․

The ergonomic design of the grips reduces hand fatigue during long fishing sessions, allowing anglers to fish more comfortably for extended periods․ Cork also transmits vibrations effectively, enhancing the angler’s feel for the lure and any subtle strikes․ This increased sensitivity allows for quicker reaction times, resulting in more hooksets․

The premium cork grips not only provide functional benefits, but also add a touch of classic styling to the rod’s overall aesthetic․ These grips are a key feature contributing to the rod’s performance and angler satisfaction․

Okuma Guide Select A Series: Enhancements and Technology

The Okuma Guide Select A Series Swimbait Rods incorporate advanced technology․ This provides anglers with enhanced performance․ Unidirectional Fiber Reinforcement (UFR) offers increased lifting power․ This series reimagines the original Guide Select rods․

Unidirectional Fiber Reinforcement (UFR) Technology

Okuma’s Unidirectional Fiber Reinforcement (UFR) technology is a key enhancement in the Guide Select A Series Swimbait Rods․ This innovative technology significantly boosts the rod’s tip section lifting power, providing anglers with a distinct advantage when battling large fish․ UFR technology strategically aligns the graphite fibers within the rod blank, maximizing strength and responsiveness․
This reinforcement technique results in a rod that can handle heavier loads and provide better control during hooksets and fights․ The UFR technology allows anglers to confidently use larger swimbaits and target trophy-sized fish․ The enhanced lifting power minimizes the risk of losing fish․ It offers a more direct connection to the lure․ This improves sensitivity and overall fishing experience․ The UFR technology sets the Guide Select A Series apart from other swimbait rods in its class․

Improved Lifting Power

The Okuma Guide Select A Series Swimbait Rods showcase a significant improvement in lifting power compared to the original Guide Select models․ This enhancement is primarily attributed to the integration of Unidirectional Fiber Reinforcement (UFR) technology․ The UFR technology provides up to three times the tip section lifting power of the original Guide Select Swimbait Rods․

This increased power translates to better control when fighting large fish․ It allows anglers to effectively set the hook and maintain pressure throughout the battle․ The improved lifting power also aids in retrieving swimbaits through heavy cover․ It helps to prevent snags and ensures that the lure remains in the strike zone․ This enhancement allows anglers to handle bigger swimbaits․ It ultimately increases their chances of landing trophy-sized bass․ The enhanced power is a key feature for anglers targeting larger species․

Okuma Guide Select Custom Black Swimbait Rods: Collaboration and Design

The Okuma Guide Select Custom Black Swimbait Rods represent a collaborative effort between Okuma and Tackle Warehouse staff members․ This partnership ensures that the rods are built to meet the specific needs and preferences of swimbait anglers․ The design process involved incorporating precise specifications and special requests from experienced anglers․ The aim was to create a series of swimbait rods that offers high performance at an affordable price point․

The Custom Black series reflects a deep understanding of swimbait fishing techniques and the demands placed on the equipment․ This collaboration resulted in rods with carefully selected components and optimized actions․ These rods provide the power, sensitivity, and durability required for effectively fishing swimbaits․ The collaboration helped to create a high performing rod․

Rod Selection: Balancing Swimbait Weight and Action

Selecting the right Okuma Guide Select Swimbait Rod involves carefully balancing the weight of your swimbait with the rod’s action․ This ensures optimal casting distance, lure presentation, and hook-setting power; Consider the specific weight range recommended for the rod․ Overloading the rod can lead to casting issues and potential damage․

Conversely, using a swimbait that is too light may not properly load the rod․ This reduces casting distance and sensitivity․ The rod’s action, typically described as moderate, fast, or extra-fast, should complement the type of swimbait you are using․ A moderate action rod provides a parabolic bend, suitable for treble-hooked swimbaits․ A fast action rod offers more power for single-hook swimbaits․ Evaluate the rod’s action to find something to work for you․

User Reviews and Performance

User reviews of the Okuma Guide Select Swimbait Rods often highlight their impressive performance and value․ Many anglers praise the rod’s sensitivity, allowing them to detect subtle strikes and maintain constant contact with their swimbait․ The rod’s backbone is frequently commended․ This provides the necessary power to handle large fish and drive hooks home effectively․

Users have noted the rod’s ability to handle a variety of swimbait sizes and weights․ This makes it a versatile option for different fishing situations․ Some reviewers specifically mention the rod’s performance with DRT Jokers․ They show that the rod maintained pin point accuracy and they caught fish through head shakes and jumps․ The overall consensus is that the Okuma Guide Select Swimbait Rods offer excellent performance at a competitive price․

Budget-Friendly Aspects

The Okuma Guide Select Swimbait Rods stand out for their budget-friendly nature․ They provide exceptional value without compromising quality or performance․ Anglers appreciate that these rods offer high-end features at a more accessible price point, making them a popular choice for both experienced swimbait anglers and those just getting started․

Despite their affordability, these rods incorporate quality components․ This makes them a durable and reliable option for regular use․ The combination of performance and reasonable cost makes the Okuma Guide Select Swimbait Rods an attractive option for anglers․ They want to maximize their investment without sacrificing the tools to catch big fish․ The series proves that quality doesn’t always have to come with a premium price tag․

Versatility for Inshore Fishing

While primarily designed for targeting bass with swimbaits, the Okuma Guide Select series also demonstrates versatility for inshore fishing applications․ The rod’s power and sensitivity translate well to targeting various inshore species; Anglers can effectively use these rods for species like snook, redfish, and speckled trout․
The ability to handle a range of lure sizes and fighting techniques makes the Guide Select a practical option for anglers․ They want a single rod that can perform across multiple inshore scenarios․ The rod’s construction and quality components ensure it can withstand the harsh saltwater environment․ This extends its utility beyond freshwater bass fishing․ This versatility adds to the overall value․ This makes it a worthwhile investment for anglers exploring diverse fishing environments․

georgia marriage license application pdf

Georgia Marriage License Application: A Comprehensive Guide

If you’re planning to tie the knot in the Peach State, this guide provides essential information․ It covers the application process through probate courts, including necessary documents․

Eligibility Requirements

To obtain a marriage license in Georgia, certain eligibility requirements must be met․ Firstly, applicants must be of sound mind and not have a living spouse from a prior, undissolved marriage․ As of July 1, 2019, no one under the age of 17 can obtain a marriage license in Georgia, regardless of circumstances․

If an applicant is 17 years old, they must demonstrate emancipation for at least 15 days․ Additionally, they must complete specialized premarital counseling․ If both applicants are 18 years or older, no parental consent is needed․

Furthermore, applicants must provide proof of age through a valid driver’s license, birth certificate, or passport․ Ensuring that you meet these requirements is crucial for a smooth application process with the county probate court․ Make sure you have the correct documents․

Age Restrictions for Applicants

Georgia law sets specific age restrictions for obtaining a marriage license․ As of July 1, 2019, individuals must be at least 17 years old to apply․ However, those under 17 are prohibited from obtaining a marriage license under any circumstances․

If an applicant is 17 years old, they must meet additional requirements․ These include demonstrating legal emancipation for a minimum of 15 days and completing premarital education․ Furthermore, when one applicant is 17, the older applicant can be no more than four years older․

Applicants 18 years of age or older face no additional age-related restrictions, provided they meet all other eligibility criteria․ Proof of age, such as a driver’s license, birth certificate, or passport, is required for all applicants to verify their age․ Understanding these regulations is essential․

Identification Requirements

When applying for a marriage license in Georgia, providing proper identification is crucial․ Both applicants must present valid photo identification containing their correct name and date of birth․ Acceptable forms of identification typically include a valid driver’s license, a state-issued ID card, or a passport․

For applicants born outside the United States, an original or certified copy of their birth certificate, along with a certified translation in English if applicable, is often required in addition to a valid passport․ These documents help verify identity and age, ensuring compliance with Georgia law․

It’s essential to ensure that the identification presented is current and has not expired․ Any discrepancies in names or dates of birth may cause delays or rejection of the application․ Check with the county probate court for their specific identification requirements․

Residency Requirements

Georgia’s residency requirements for obtaining a marriage license are fairly straightforward․ If either applicant is a resident of the State of Georgia, they can obtain the marriage license from any probate court within the state; It’s not mandatory to apply in the county where either applicant legally resides․

However, if neither applicant is a resident of Georgia, they must apply for the marriage license in the county where the marriage ceremony will be performed․ This ensures that the marriage is properly recorded and recognized within the state’s jurisdiction․

Proof of residency, such as a valid driver’s license or state-issued ID with a current address, may be requested by the probate court․ It’s always best to verify the specific requirements with the county where you plan to apply to avoid any complications during the application process․

The Application Process

To get a marriage license in Georgia, visit the county probate court․ Some courts offer online applications, but processing is typically walk-in․

Where to Apply: County Probate Courts

In Georgia, the journey to obtaining a marriage license begins at your local County Probate Court․ These courts are responsible for issuing marriage licenses to eligible couples․ If either applicant resides in Georgia, you can apply at the Probate Court in any county within the state, regardless of where the wedding ceremony will take place․ It’s not mandatory to apply in the county where either applicant legally resides․

Henry County Probate Court is a common location․ Both prospective partners must appear in person at the Probate Judge’s office to complete a marriage application․ Remember to bring all required documents to streamline the process․ The marriage license is valid only for ceremonies performed within Georgia․ If the signing occurs within Georgia, it must happen in the county where the license was originally issued․

Online Application Availability

While some Georgia counties may offer the convenience of initiating the marriage license application process online, it’s crucial to understand that the entire process typically cannot be completed remotely․ Often, the online portion serves as a preliminary step, allowing applicants to fill out the necessary forms and provide required information before visiting the Probate Court in person․

Keep in mind that even if an online application is available, you will likely still need to appear in person at the Probate Court to submit original documents, pay the required fees, and finalize the application․ Some counties require you to return the original marriage license to the Probate Court either personally or via U․S․ Mail, particularly if you have an officiant for your ceremony․

Walk-in Basis Processing

In many Georgia counties, marriage license applications are primarily processed on a walk-in basis․ This means that prospective couples can visit the County Probate Court during its regular business hours to submit their application and required documents․ While some courts may encourage or even require initiating the process online, the finalization often necessitates an in-person visit․

It’s advisable to check the specific requirements and procedures of the Probate Court in the county where you intend to apply․ Some courts may accept appointments to avoid long wait times․ Remember to bring all necessary documentation, including valid identification, proof of divorce (if applicable), and any other required paperwork to ensure a smooth and efficient application process․ Be prepared to complete the application on-site and pay the associated fees․

Required Documents

When applying for a marriage license in Georgia, you must present valid identification․ If previously married, you’ll also need to provide divorce decrees or death certificates․

Acceptable Forms of Identification

To obtain a marriage license in Georgia, you and your future spouse must provide valid identification․ This is crucial for verifying your identity and age․ Acceptable forms of identification typically include a valid driver’s license issued by any state․

A state-issued identification card is also accepted, ensuring that your name and date of birth are accurate․ Original or certified copies of birth certificates are valid․ A valid passport is another universally accepted form of identification, providing proof of citizenship․ A valid military ID can be used․

The identification must contain your correct name and date of birth․ These documents help the probate court ensure that all legal requirements are met․ If you are unsure whether a particular document will be accepted, it’s best to contact the probate court in the county where you plan to apply․

Divorce Decree or Death Certificate (if applicable)

If either applicant has been previously married, providing a divorce decree or death certificate is essential․ This documentation proves the legal termination of the previous marriage, ensuring the applicant is eligible to remarry under Georgia law․ The probate court requires either a signed or sealed divorce judgment․

If the previous spouse is deceased, you must provide a certified copy of the death certificate․ Having these documents ready when applying for a marriage license will minimize delays․ Failure to provide this documentation will prevent the issuance of a marriage license․

Ensure that the divorce decree includes the judge’s signature and court seal, if applicable․ The death certificate must be an original or a certified copy issued by the appropriate vital records office․ Remember to gather these necessary supporting documents to streamline your application process at the probate court․

Post-Application Information

After obtaining your marriage license, understand officiant duties and license validity․ The officiant must complete the license, and the original must be returned promptly, either personally or by mail․

Officiant Responsibilities

In Georgia, marriage solemnization falls upon authorized individuals such as ministers, judges, city recorders, and magistrates․ It is the couple’s responsibility to find an officiant willing to complete the marriage license․ After the ceremony, the officiant must ensure the license is properly filled out and promptly returned to the Probate Court․

The officiant’s role is crucial in legalizing the marriage․ They must verify the information on the license, witness the signing, and submit it as required․ Failure to do so can create complications․ Remember, the signing must occur in the county where the license was initially issued․ Carefully follow instructions provided by the court․

The officiant plays a pivotal role, by ensuring compliance with all Georgia laws․

License Validity and Expiration

One notable advantage in Georgia is that marriage licenses do not have an expiration date․ This means once you obtain your license, you can marry at any time in the future․ There is no rush․ However, it’s crucial to remember that the marriage ceremony must be performed within the state of Georgia․

While there’s no expiration date, prompt return of the completed license is essential after the ceremony․ Typically, the officiant is responsible for returning it to the Probate Court, either in person or by mail․

Ensure all details are accurately filled out before submission․ This avoids any potential delays or complications in officially recording your marriage․ Take your time to ensure everything is correct․

Premarital Education

Georgia encourages premarital education․ Couples completing a qualified premarital education course may be eligible for a reduced marriage license fee, making it both beneficial and cost-effective․

Reduced Fee for Premarital Education

In Georgia, couples who complete a premarital education course meeting specific requirements may qualify for a reduced marriage license fee․ This incentive encourages prospective spouses to engage in counseling before marriage․ To be eligible, the premarital education must address conflict management, communication skills, financial responsibilities, and family roles․

The counseling must be provided by a licensed professional counselor, social worker, marriage and family therapist, psychiatrist, or psychologist licensed in Georgia, or an active member of the clergy․ Completing this education not only reduces the license fee but also equips couples with valuable tools for a successful marriage․

Proof of completion, as per O․C․G․A․ 19-3-30․1, must be presented during the application process․ This certificate validates that the couple has fulfilled the premarital education requirements, entitling them to the reduced fee․ It is a worthwhile investment in their future․

2022 toyota 4runner maintenance schedule pdf

The 2022 Toyota 4Runner is a robust SUV requiring regular maintenance to ensure its longevity and optimal performance. Adhering to a proper schedule, whether through a dealership or DIY, is essential for maintaining your vehicle.

Importance of Regular Maintenance

Regular maintenance is vital for the 2022 Toyota 4Runner, ensuring its reliable performance and longevity. Scheduled servicing, like oil changes and inspections, keeps the engine running smoothly and prevents premature wear. This proactive approach helps maintain the 4Runner’s safety and efficiency, protecting your investment and maximizing its lifespan. Consistent upkeep reduces the risk of major repairs and helps the vehicle retain its value. By following the recommended maintenance schedule, you ensure the 4Runner continues to deliver optimal performance and dependability for all your adventures, both on and off the road, and ultimately saves money in the long run.

General Maintenance Schedule Overview

The 2022 Toyota 4Runner maintenance schedule generally includes service at 5,000-mile or 6-month intervals, with oil changes typically required every 10,000 miles or 12 months, depending on usage.

5,000 Mile/6-Month Service Interval

The 5,000-mile or 6-month service interval for the 2022 Toyota 4Runner is crucial for maintaining its engine health. This service typically includes an oil change and replacement of the oil filter; These actions ensure the engine functions correctly and prevent premature wear. Regular checks at this interval also enable early detection of potential issues. It’s a simple process, often taking less than an hour, making it a manageable task for both dealership visits and DIY enthusiasts, with costs varying depending on the type of oil used.

10,000 Mile/12-Month Service Interval (Oil Change)

The 10,000-mile or 12-month service interval for your 2022 Toyota 4Runner primarily focuses on another oil change, typically taking less than 30 minutes. This regular oil change is essential for maintaining engine performance and longevity. Alongside the oil change, it is advisable to replace the oil filter. While this interval is generally observed under normal driving conditions, more frequent changes may be required for vehicles under heavy usage. Costs for this service are typically around 40 dollars, varying based on the filter used and location.

Manufacturer’s Recommended Intervals

Toyota recommends that the 2022 4Runner undergo maintenance at 5,000-mile or 6-month intervals. These intervals include an oil change and filter replacement. While the manufacturer suggests 5,000-mile intervals, oil changes are typically scheduled at 10,000 miles or 12 months for standard driving conditions. However, you should always consult your owner’s manual or an authorized Toyota service professional for specific service needs. The manufacturer’s recommendations are designed to keep your vehicle running efficiently and to prevent premature wear. By adhering to these intervals, you ensure the best performance and longevity of your 4Runner.

Key Maintenance Components

Key maintenance for your 2022 Toyota 4Runner includes regular engine oil and filter changes, as well as inspection of hoses and belts. These components are vital for vehicle performance.

Engine Oil and Filter

Regular engine oil and filter changes are crucial for the 2022 Toyota 4Runner. Toyota recommends oil changes every 10,000 miles or 12 months, unless the vehicle experiences severe driving conditions. This service, often performed at 5,000-mile intervals, helps maintain engine health and prevents premature wear. Using genuine Toyota fluids is recommended to keep the engine running efficiently. The oil change, typically an easy DIY task, can also be done by a Toyota dealership. This essential procedure ensures the engine functions correctly. The estimated cost for this maintenance can vary depending on the oil and filter used.

Inspection of Hoses and Belts

Regular inspection of hoses and belts is a critical part of the 2022 Toyota 4Runner’s maintenance schedule. These components, while durable, wear out over time and need to be checked periodically to prevent unexpected breakdowns. The inspection should involve looking for any signs of cracking, fraying, or looseness. Hoses should be checked for leaks or bulges. Replacing worn hoses and belts ensures the vehicle’s systems function correctly. This inspection is typically part of the general service at 5,000-mile intervals. Keeping up with these checks is essential for maintaining the vehicle’s reliability and safety.

Warranty and Maintenance Guides

Toyota provides comprehensive warranty and maintenance guides for the 2022 4Runner. These resources are essential for understanding coverage and recommended service intervals. Consult these for proper care.

Toyota Warranty Coverage Details

The 2022 Toyota 4Runner comes with a comprehensive warranty package. This includes a basic warranty that typically covers 36 months or 36,000 miles, whichever comes first. Additionally, powertrain components are often covered for a longer period, usually 60 months or 60,000 miles. Hybrid-related components, if applicable, such as the battery, have extended coverage of 8 years or 100,000 miles. Accessories purchased at the time of the new vehicle purchase are covered for 36 months/36,000 miles, matching the new vehicle limited warranty. Always refer to your official warranty documentation for complete details and specific terms.

Accessory Warranty Information

For accessories purchased at the time of your new 2022 Toyota 4Runner purchase, the Toyota Accessory Warranty provides coverage for 36 months or 36,000 miles, whichever occurs first. This warranty aligns with the coverage of the Toyota New Vehicle Limited Warranty, offering peace of mind. However, accessories bought and installed after the initial vehicle purchase may have different warranty terms. These could be covered by a separate warranty, possibly for 12 months, though this can vary. Always check the specific warranty details for each accessory to understand the extent of coverage and any limitations that may apply.

Cost and Reliability

The 2022 Toyota 4Runner boasts lower 10-year maintenance costs than the industry average, and a lower probability of requiring major repairs, contributing to its strong reliability reputation.

10-Year Maintenance and Repair Costs

Over a ten-year period, owners of a 2022 Toyota 4Runner can anticipate spending approximately $5,983 on maintenance and repairs. This figure is notably lower than the average cost for popular SUV models, which typically amounts to about $2,267 more. The 4Runner’s robust build and engineering translate to cost savings for owners in the long run. This impressive difference highlights the 4Runner’s reliability and reduces the overall ownership expenses compared to other vehicles in the same segment. This long-term cost-effectiveness underscores the value of investing in a well-built SUV like the Toyota 4Runner.

Comparison to Industry Average

The 2022 Toyota 4Runner stands out with its lower maintenance and repair costs, averaging around $5,983 over ten years, which is notably $2,267 less than the industry average for comparable SUVs; Furthermore, the 4Runner has a 16.08% chance of needing a major repair within that timeframe, which is 7.39% better than other vehicles in its class. This significant difference shows the 4Runner’s reliability and durability compared to its competitors. Owners can expect fewer unexpected repairs and lower overall operating expenses, making it a financially sound choice when considering long-term ownership.

Additional Resources

For detailed maintenance information, consult your Toyota 4Runner’s owner’s manual. Online maintenance maps for the 5th generation 4Runner are also available for extended mileage guidance.

Owner’s Manual Reference

Your 2022 Toyota 4Runner’s owner’s manual is the primary resource for all maintenance guidelines and schedules. This comprehensive guide provides specific details on recommended service intervals, fluid types, and inspection procedures. It eliminates the need for separate repair manuals, offering a centralized location for all vehicle-related information. The manual also includes warranty details and feature explanations. It is designed to be user-friendly, with tabbed sections for easy navigation. Always consult your owner’s manual for the most accurate and up-to-date maintenance information specific to your 4Runner model. This will ensure proper care and help maintain your vehicle’s performance and longevity.

Online Maintenance Maps (5th Gen)

Online maintenance maps are available for the 5th generation Toyota 4Runner, covering schedules from 0 to 300,000 miles. These maps provide a visual and detailed breakdown of the maintenance required at various milestones. They are a community-driven project, allowing for continuous improvement and adaptation based on user feedback. These maps detail maintenance schedules at 0-100K, 100K-200K, and 200K-300K miles. They are designed as an ongoing project and serve as a valuable resource for 4Runner owners. They provide a convenient and easily accessible method for tracking maintenance requirements. Users are encouraged to contribute suggestions to enhance their accuracy and usefulness.

Prepaid Maintenance and Extended Warranty

Prepaid maintenance plans and extended warranties offer options for covering your 4Runner’s service costs. These plans can provide savings and peace of mind for long-term ownership.

Benefits of Prepaid Maintenance Plans

Prepaid maintenance plans for your 2022 Toyota 4Runner offer several key advantages. These plans often lock in the cost of routine services like oil changes and tire rotations, shielding you from potential price increases over time. They can simplify budgeting for vehicle maintenance by spreading the cost out, eliminating the need to pay for each service individually. Additionally, they often include services performed by certified Toyota technicians, helping ensure high quality work and the use of genuine parts. Finally, these plans may make the overall cost of ownership more predictable, potentially saving you money in the long run.

Extended Warranty Options

Extended warranty options for your 2022 Toyota 4Runner provide additional protection beyond the standard manufacturer’s warranty. These plans can cover major repairs and component failures that may occur after the original warranty expires. Toyota Financial Services often offers extended warranty plans, giving you the option to protect your investment for a longer period. By having an extended warranty, you gain peace of mind knowing that unexpected repair costs can be mitigated. These warranties may also include additional benefits such as roadside assistance or rental car reimbursement. Consider an extended warranty if you plan to keep your 4Runner for an extended period.

Specific Service Operations

Maintaining your 2022 Toyota 4Runner can be done through authorized Toyota dealerships or by performing DIY maintenance. Both options have benefits depending on your skills and resources.

Toyota Dealership Service

Opting for Toyota dealership service for your 2022 4Runner ensures maintenance is performed by trained technicians using genuine Toyota parts and fluids. Dealerships adhere to the manufacturer’s recommended schedule and have access to the latest diagnostic tools and technical information, providing a reliable service experience. While potentially more costly than DIY options, using a dealership offers peace of mind, especially for complex maintenance tasks and warranty-related work. They also provide detailed records of your 4Runner’s service history, which can be beneficial for resale value and warranty claims. Many dealerships also offer convenient scheduling and service reminders for your 4Runner.

DIY Maintenance Options

Performing DIY maintenance on your 2022 Toyota 4Runner can be a cost-effective and rewarding experience, allowing you to understand your vehicle better. Simple tasks like checking fluid levels, replacing air filters, and changing the engine oil can often be accomplished with basic tools and knowledge. However, it’s crucial to follow the manufacturer’s recommended procedures and use quality parts to avoid potential damage. Online resources and forums can be valuable for guidance, but be cautious when tackling more complex tasks. If you are not confident in your abilities, professional service is always a safer option to ensure your 4Runner remains in top condition.

guided eastern turkey hunts

Guided Eastern Turkey Hunts⁚ A Comprehensive Guide

Experience the thrill of Eastern turkey hunting with expert guides. These hunts offer unparalleled access to prime hunting grounds, personalized instruction, and high success rates. Whether novice or seasoned hunter, a guided hunt ensures an unforgettable adventure.

Choosing Your Hunting Location

Selecting the right location is paramount for a successful Eastern turkey hunt. Consider factors like the density of turkey populations, the terrain (hardwood ridges, fields, and pastures are ideal), and the access permitted. Private land access often proves advantageous, offering exclusive hunting opportunities and potentially higher bird densities. Public lands, while accessible, may have higher hunter pressure, necessitating more careful planning and potentially longer travel distances to reach less-crowded areas. Research specific hunting areas beforehand. Examine maps and utilize online resources to identify locations with known turkey activity. Consider the proximity to lodging and other amenities, balancing hunting opportunities with logistical convenience. A well-chosen location significantly impacts the overall hunting experience and chances of success.

Factors Affecting Hunt Success Rates

Several key factors significantly influence the success rate of guided Eastern turkey hunts. Experienced and knowledgeable guides play a crucial role, possessing expertise in locating birds, employing effective calling techniques, and understanding turkey behavior. The time of year, specifically within the hunting season, impacts turkey activity levels. Weather conditions, such as temperature and precipitation, can affect bird movement and hunting opportunities. The hunting location itself plays a pivotal part; high-density turkey populations and suitable habitat directly increase success rates. Hunter skill and experience also contribute; proficient hunters are more likely to capitalize on opportunities. Finally, the specific hunting methods employed, including calling strategies and camouflage techniques, can greatly impact results. A combination of favorable factors maximizes the chances of a successful hunt.

Types of Guided Hunts Available

The spectrum of guided Eastern turkey hunts caters to diverse preferences and experience levels. Fully guided hunts provide comprehensive assistance, with experienced guides handling all aspects from locating birds to calling and shot placement. Semi-guided hunts offer a balance, providing guidance and support while allowing hunters more autonomy in the hunting process. These hunts often involve pre-scouting and strategic advice from the guides. Self-guided hunts offer the most independence; hunters utilize provided land access and may receive pre-hunt briefings but are responsible for their own hunting strategies. Some outfitters also offer specialized hunts, such as those focused on specific hunting methods, targeting trophy birds, or incorporating unique lodging and amenities. The choice depends on individual hunting experience, desired level of guidance, and budget considerations.

Essential Gear and Equipment

Successful Eastern turkey hunting requires specialized gear. A high-quality shotgun, ideally a 12-gauge or 20-gauge with a reliable choke, is paramount. Ammunition selection is crucial; consider using shotshells designed for turkey hunting, such as those with larger shot sizes like #4 or #5. A comfortable and weather-appropriate camouflage outfit is essential for concealment. Binoculars for spotting birds at a distance and a rangefinder for accurate distance estimations are valuable tools. A reliable turkey call, including a diaphragm call, slate call, or box call, is essential for mimicking turkey vocalizations. A comfortable and supportive backpack to carry all equipment and other essentials is highly recommended; Additional items to consider include a sturdy hunting knife, waterproof matches or lighter, first-aid kit, and plenty of water and snacks. Remember to always comply with all local hunting regulations and safety guidelines.

Safety Precautions and Regulations

Prioritize safety during your Eastern turkey hunt. Always treat every firearm as if it were loaded, keeping your finger off the trigger until ready to shoot; Be certain of your target and what is beyond it before firing. Wear blaze orange to increase visibility to other hunters. Communicate clearly with your hunting party, especially when moving through cover. Be aware of your surroundings and potential hazards, such as uneven terrain and obstacles. Understand and adhere to all state and local hunting regulations, including licensing requirements, bag limits, and legal hunting hours. Familiarize yourself with the specific rules of the hunting area you’ll be in. Carry a first-aid kit and know basic first aid procedures. Inform someone of your hunting plans and expected return time. Never hunt alone; always have a hunting partner for safety and assistance.

Planning Your Eastern Turkey Hunt

Meticulous planning is key for a successful Eastern turkey hunt. Research reputable outfitters, compare packages, and book well in advance, especially for peak seasons.

Booking Your Guided Hunt

Securing your guided Eastern turkey hunt requires careful planning and consideration. Begin by researching reputable outfitters and guides, focusing on those with proven track records and positive client reviews. Check their websites or contact them directly to discuss hunt dates, available packages, and pricing. Inquire about the specific hunting locations, the type of accommodations provided, and whether meals are included in the package. It is crucial to clarify the guide’s experience level, hunting methods, and success rates. Understand the licensing and permit requirements for hunting in the chosen location, and ensure that all necessary paperwork is completed well in advance of your hunt.

Many outfitters offer various packages, ranging from basic hunts to all-inclusive luxury experiences. Consider your budget, desired level of comfort, and preferred hunting style when selecting a package. Some packages might include lodging, meals, transportation to and from hunting locations, and the services of an experienced guide. Others might only cover the guided hunting portion, requiring you to arrange your own lodging and meals. Confirm all details with the outfitter before making a booking to avoid any misunderstandings or unexpected expenses. Booking well in advance is highly recommended, particularly if you’re planning your hunt during peak season, to secure your spot and avoid disappointment.

Understanding Hunt Packages and Costs

Eastern turkey hunt packages vary significantly in price and inclusions. Costs are influenced by factors like the duration of the hunt, the level of guiding (fully guided, semi-guided, or unguided), the quality of lodging and meals provided (if any), and the access to hunting land (private versus public). Fully guided hunts, offering expert guidance and all-inclusive services, typically command higher prices than semi-guided or unguided options. Expect to pay anywhere from a few hundred dollars for a basic, short, unguided hunt to several thousand dollars for a luxurious, multi-day, fully guided experience. Some packages include lodging, meals, and transportation, while others only cover the guiding fees and hunting licenses.

Carefully review the details of each package to understand exactly what is included. Don’t hesitate to ask clarifying questions about any unclear aspects before committing to a booking. Hidden costs, such as additional fees for trophy processing or transportation of harvested birds, should be explicitly clarified upfront. Compare prices from multiple outfitters to find the best value for your budget and requirements. Consider the overall experience you’re seeking; a higher price may reflect superior guiding, better hunting locations, and a more comfortable overall hunting experience. Always request a detailed breakdown of the costs before making a final decision.

Pre-Hunt Preparation and Research

Before embarking on your guided Eastern turkey hunt, thorough preparation is crucial for a successful and enjoyable experience. Begin by researching licensed and reputable outfitters. Check online reviews and seek recommendations from other hunters to gauge their reputation and service quality. Once you’ve selected an outfitter, carefully review the hunt package details, paying close attention to what’s included (lodging, meals, guiding services, licenses) and what’s not. Confirm all aspects of the hunt, including dates, times, and meeting locations. Familiarize yourself with the specific hunting regulations in the state where your hunt will take place; these vary by location and season.

Physically prepare for the hunt by ensuring you are in good physical condition. Eastern turkey hunting often involves long days of walking and hiking over varied terrain. Practice your shooting skills with your firearm to maintain accuracy and confidence. Pack appropriate clothing and gear based on the expected weather conditions. Consider bringing extra layers for warmth and rain protection. Inform yourself about the local wildlife and safety procedures to ensure a safe and responsible hunting experience. Thorough preparation significantly enhances your chances of a successful and memorable hunt.

What to Expect During Your Hunt

A guided Eastern turkey hunt typically begins before sunrise. Expect early mornings and long days spent in the field, often involving considerable walking. Your guide will lead you to prime hunting locations based on their knowledge of the terrain and turkey behavior. They’ll utilize various techniques, including calling and scouting, to locate birds. Patience is key; turkey hunting can be challenging, and success isn’t guaranteed. Your guide will provide instruction on safe firearm handling, ethical hunting practices, and proper field care for harvested birds. You’ll likely spend time observing turkey behavior, learning to identify tracks, and understanding their feeding and roosting patterns. Communication with your guide is crucial; be prepared to follow their instructions carefully for safety and to maximize your hunting opportunities. Enjoy the camaraderie and shared experience with fellow hunters and your guide.

Remember that weather conditions can vary dramatically, impacting visibility and bird activity. Be prepared for a range of temperatures and potential changes in the weather. Maintain a positive attitude; even without a successful harvest, the experience itself offers valuable learning and appreciation for nature. The focus should be on ethical hunting, responsible behavior and a respect for the environment. A successful hunt combines skill, preparation and a little luck.

Maximizing Your Hunting Experience

Enhance your Eastern turkey hunt by choosing reputable outfitters offering high success rates and experienced guides. Pre-hunt preparation, including physical fitness and gear check, is also crucial for a successful and enjoyable hunting trip.

Strategies for Success

Success in guided Eastern turkey hunts hinges on a blend of strategic planning and on-the-ground execution. Thorough pre-hunt scouting, often facilitated by your guide, is paramount. Understanding the terrain, identifying likely feeding and roosting areas, and recognizing turkey behavior patterns significantly improve your chances. Effective communication with your guide is essential; share observations and heed their advice. Mastering turkey calling techniques, from soft yelps to aggressive gobbles, is critical for attracting birds. Patience is key; turkeys are wary creatures, and a rushed approach often spooks them. Consider the wind direction and stay downwind to avoid detection. Utilize camouflage effectively, blending seamlessly with your surroundings. Shot placement is crucial for a clean kill; aim for the head or neck. Finally, remember that ethical hunting practices are paramount; respect the environment and adhere to all regulations.

Ethical Hunting Practices

Ethical hunting practices are fundamental to responsible Eastern turkey hunting. Respect for wildlife and the environment must always guide your actions. Adhere strictly to all hunting regulations and bag limits set by the relevant authorities. Ensure that your hunting methods are humane, prioritizing a quick and clean kill to minimize the suffering of the bird. Avoid excessive calling or aggressive tactics that could disturb other wildlife or damage the habitat. Leave no trace of your presence; pack out all trash and carefully dispose of any waste. Respect private property boundaries if hunting on private land and obtain necessary permissions. If you are unsuccessful in your hunt, accept it gracefully and focus on improving your skills for future hunts. Remember, ethical hunting is not just about the kill; it’s about responsible stewardship of the land and its resources, ensuring the sustainability of the turkey population for generations to come.

Post-Hunt Procedures

After a successful Eastern turkey hunt, several crucial post-hunt procedures ensure a safe and responsible conclusion. Begin by properly field dressing your harvested bird, following established techniques to maintain meat quality and hygiene. Accurate record-keeping is vital; record the date, time, and location of the harvest, along with the bird’s weight and sex. This information contributes to wildlife management data. If required by regulations, promptly register your harvest with the relevant game authorities. Properly cool and store the meat to prevent spoilage and maintain its quality. Respect any guidelines provided by your hunting guide regarding trophy care and preparation. Consider sharing your hunting experience with fellow enthusiasts or conservation organizations. Responsible disposal of any waste materials, including spent shells and packaging, is essential to maintain the cleanliness and integrity of the hunting environment. Remember, responsible post-hunt actions contribute to the sustainability of the sport and the conservation of wildlife.